
Flow Capture Rooms: Participating in a Room
Overview
There are several different parts of a Room to familiarize yourself with that will help you make the most of the time while you're working in one.
- Joining Preview
- Participants Panel
- Text Chat
- Temporary Markup
- Commenting and Markup
- Settings
- Removing Yourself as a Room Participant
Video walkthrough here:
Joining Preview
When you're about to join a Room session, you'll be met with an option to select your camera, microphone, and audio output/speaker. Once you do, you can toggle these on or off in the preview screen to test any or all of these inputs and outputs to ensure they're working as expected.
In addition, you'll also be able to see if any other participants are already in the Room.

Participants Panel
This section is along the right side of the app, and is accessible where you can see all of the people who've been added to the Room

You can toggle the view between showing everyone (Gallery), just spotlighting the currently speaking participant (Speaker) or turning off video and viewing participants in a list (Participants).
Text Chat
All participants within a room can collaborate in a live text chat.

This is different from Commenting and Markup in that it is specific to the room and cannot be exported.
Video walkthrough:
Temporary Markup
This tool will let anyone in the Room leave a drawing on either live or pre-uploaded assets as they're being reviewed. You can find this tool just above the top right corner of the player. Note that you'll need to have the Settings panel on the side of the Room open to switch it on. Once that's done, you can close the panel back up to get the bigger player back.
After it's enabled, just start drawing on the player wherever you want to draw someone's attention to.

It will show up in the same color as your user icon. Once you stop drawing and lift your finger off the touchpad or release the mouse button you were using to draw, your markup will begin fading. If you touch or click again, it will go back to its full opacity.
Commenting and Markup
Our timecode-accurate Commenting and Markup features allow you to annotate, draw on and leave comments at specific timestamps within the asset currently playing. Comments will reflect the dynamic range (SDR/HDR) and resolution (e..g 480p, UHD, etc.) that was being played when the participant made their comment. Comments can be just text, just markup, or a combination of both.

By default comments are sorted by timecode, appearing in the timecode order that they appear in against the asset. You can also choose to sort by date to see comments in the calendar order they were made. The "All comments" button gives you another filtering option by letting you see everything or only the comments and threads you're involved in. All comments against an asset can also be searched via keyword to help you find something in those especially busy threads.
Comments can also be edited or deleted by clicking the vertical ellipsis menu beside the comment and choosing the appropriate action.
Once all your feedback has been gathered, you can export a Room's comments and bring them into various pieces of software as using the ALE, EDL and CSV options, or as a PDF (which also includes markups) for printing or a more formal digital review.

Markup Tools (left to right)
- Sketch: Draw freehand on the asset.
- Beacon: Add a lightly pulsing Beacon to draw attention to a specific part of the asset.
- Arrow: Add an arrow to point to draw attention to a specific part of the asset with greater emphasis.
- Rectangle: Draw a rectangle on the asset.
- Circle: Draw a circle on the asset.
- Color: Change the color of your annotations. This affects all markup tools.
- Undo: Undo annotations 1 at a time.
-
Redo: If you've tapped undo too many times, redo to step forward and add the annotation back.
Video Walkthrough:
Please note: comments and annotations are tied to the assets within the Room itself. They will not be viewable on those assets when viewing in the inbox or folder. Comments can be exported at anytime, even after the Room is closed.
Settings Panel
The settings panel allows you to configure your audio and video settings to optimize your Rooms session experience. In addition, hosts will also see two muting options for the Room.

Devices
- Audio In: This allows you to set your audio input device (IE, your microphone) to be used during the session.
- Audio out: This allows to set your audio output device (IE, your speaker/headphone) to be used during the session.
-
Use Noise Reduction: When toggled on, this setting will cut down background noise from your
surroundings and emphasize your voice when you are talking. It is also helpful in cutting down feedback, although it may not eliminate it completely.
-
Video In: This allows you to set your video input device (IE, your camera) to be used during the session.
Admin (Only available to Hosts)
- Mute All On Entry: Automatically mute users when they join so that they can manually enable their microphone. Useful for that one person in the project who calls in from the loudest of places.
- Allow Participants to Unmute: Allow (or prohibit) participants to manually unmute and turn their microphone on.
Removing Yourself as a Rooms Participant
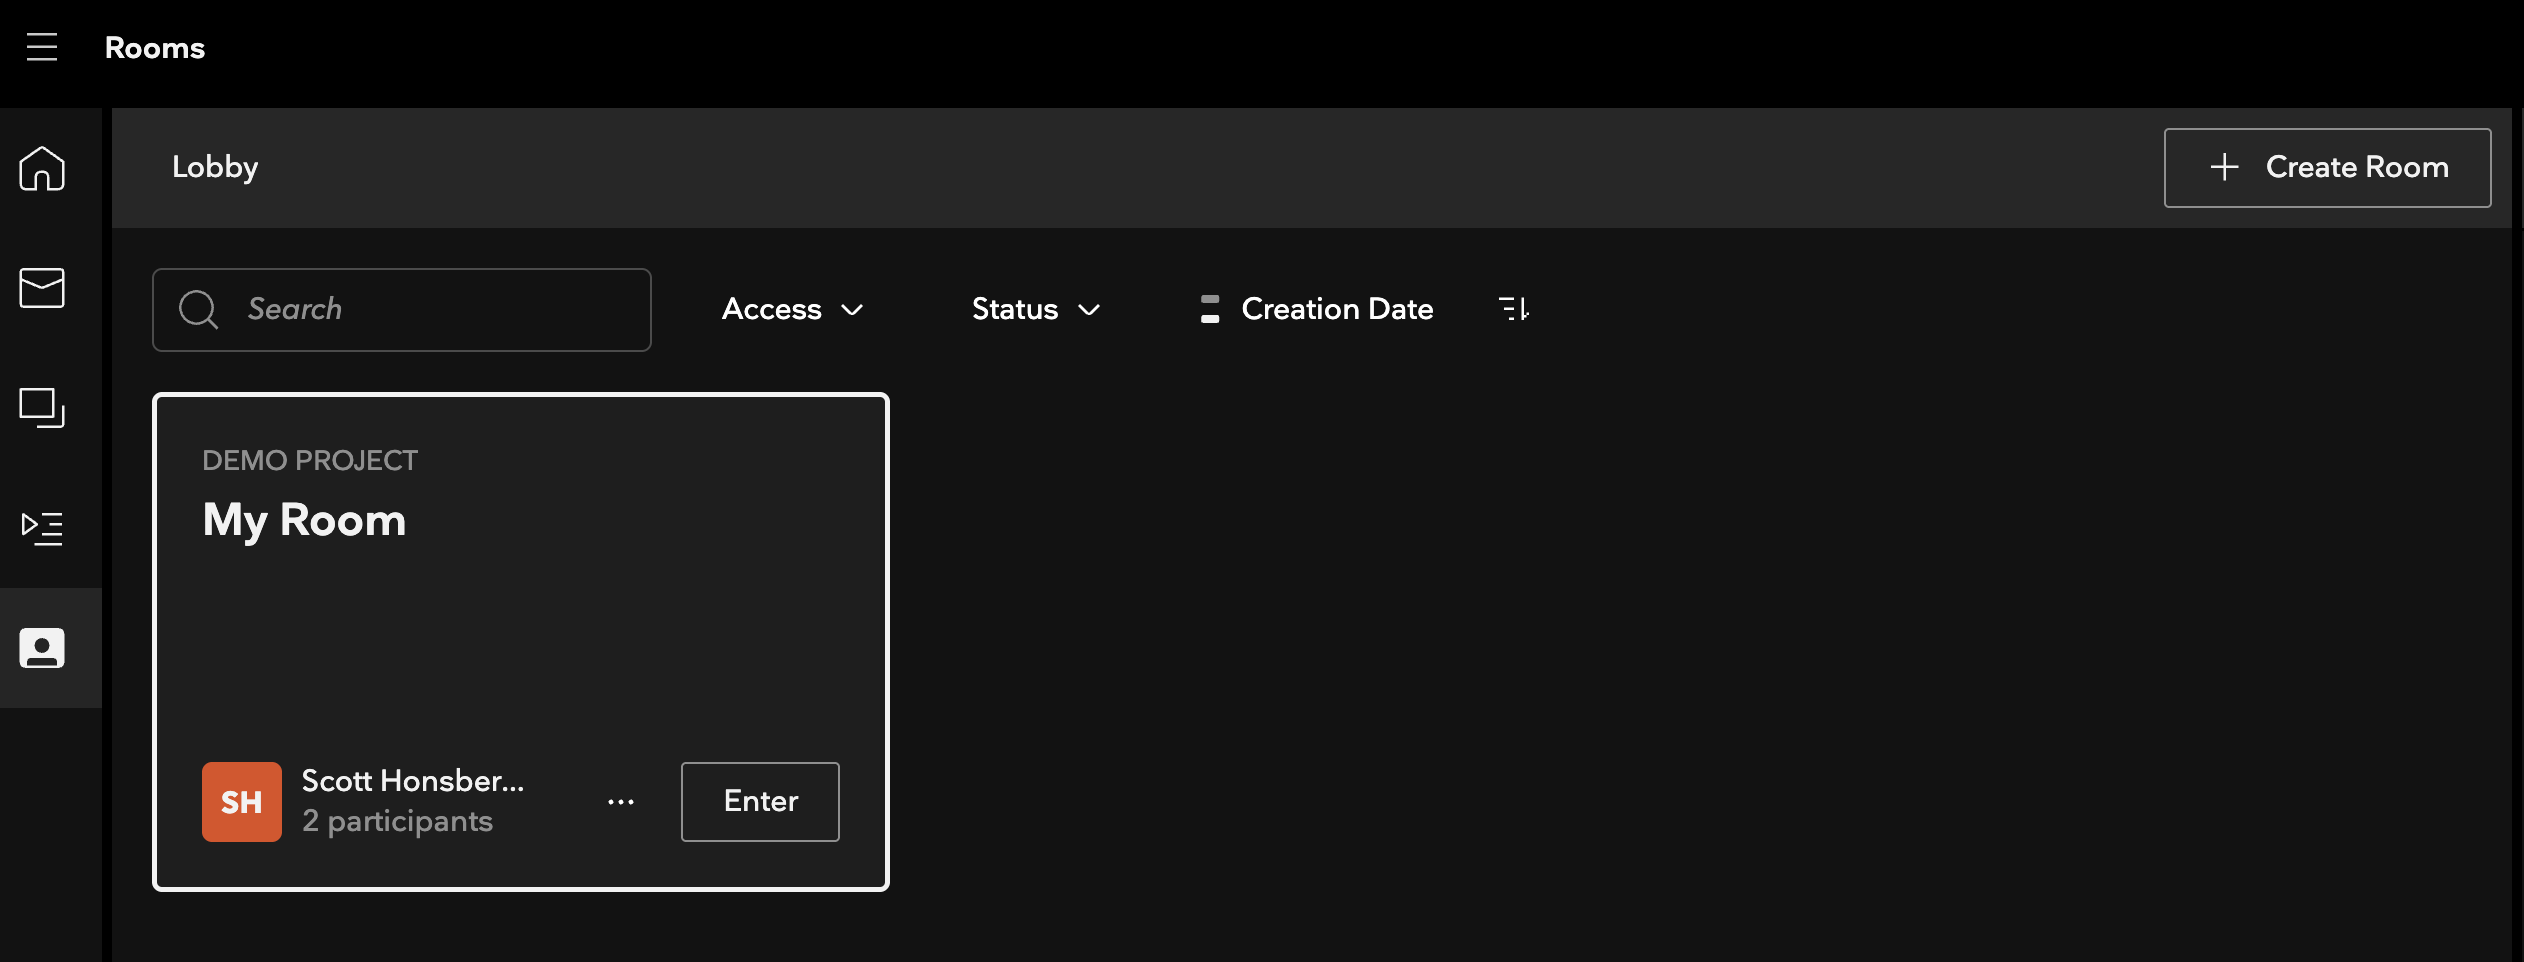
To remove yourself as a Rooms participant, first, browse to the Rooms lobby screen and select the Room:
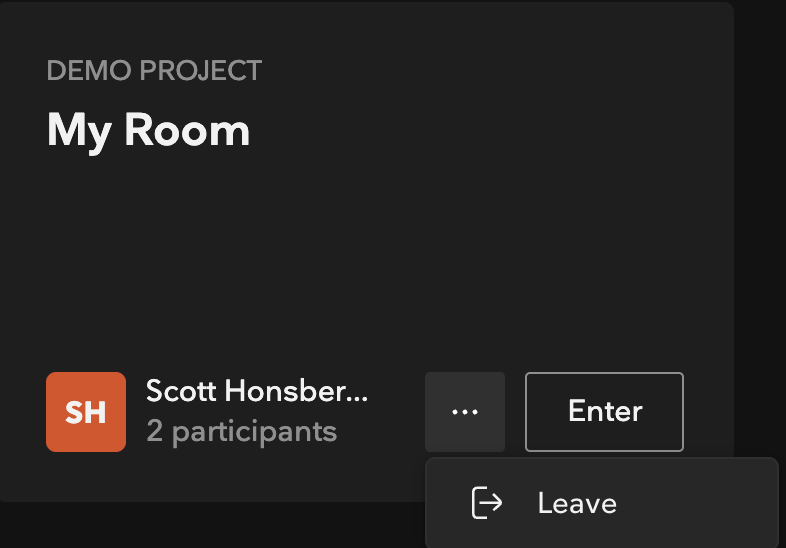
Next, click the three dots next to the Enter button, and select "Leave"
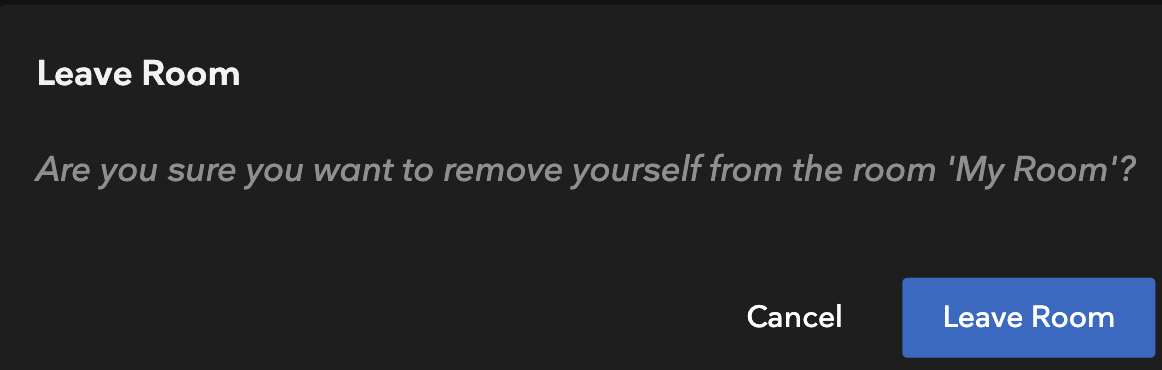
Lastly, click "Leave Room" to confirm:
You will no longer be a Participant on this Room.
Please note: This is different than leaving a Room session. You can leave a Room session and re-enter that Room session as long as that Room is open.
Removing yourself as a Participant means you are no longer associated with that Room whatsoever. In order to join that Room again, you will need to be re-added.