
Flow Capture for Android
Flow Capture has introduced an app for the Android ecosystem. To start using Android app, please click here: Application Downloads
This help doc will cover the following:
Authenticating & Setting a PIN
Once you've downloaded our Android app, you'll need to login using your Flow Capture credentials. After logging in, you'll be required to set a 6 digit PIN number. This allows you to easily access your account without needing to log in again, while still keeping the content secure.
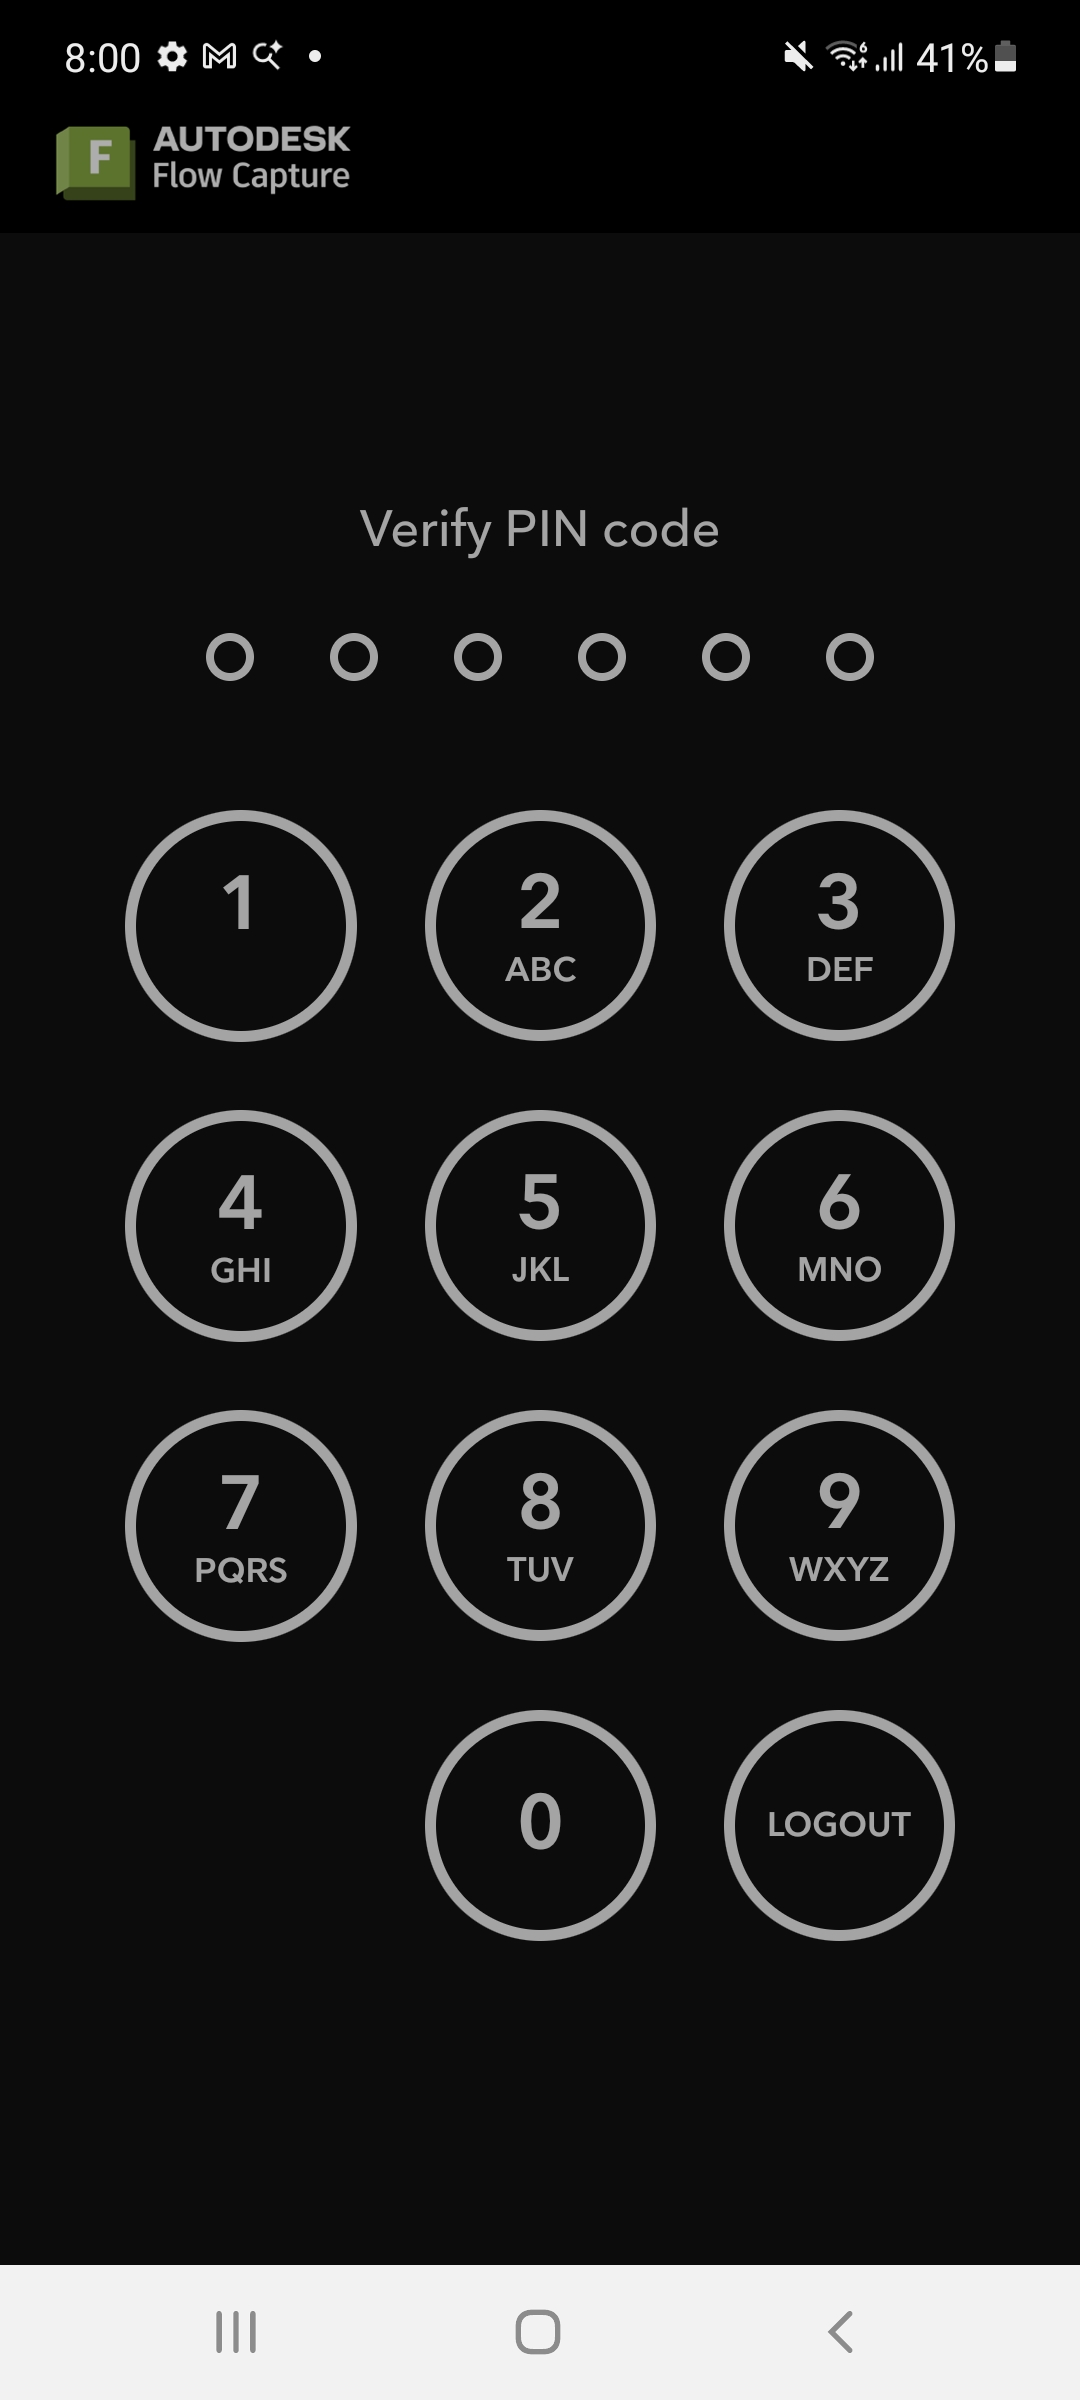
After setting your PIN, you'll also be given the option to authenticate using biometrics, which lets you use your thumbprint instead of your PIN code.
Navigating the Application: An Inbox-centred Experience
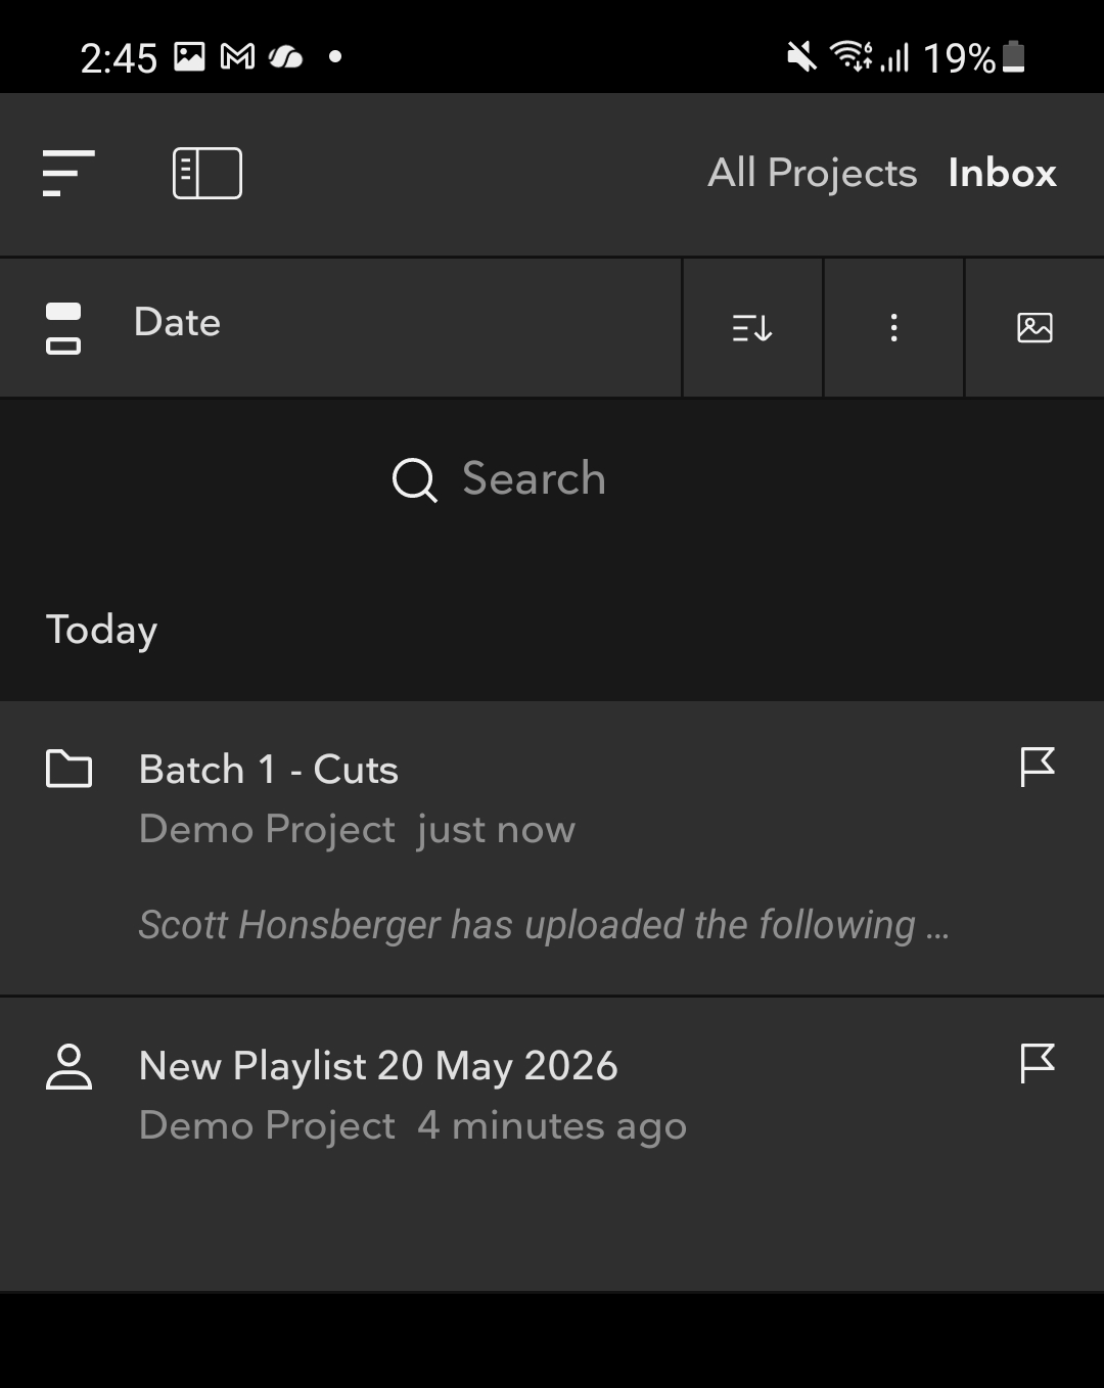
The Android app is centred around the Inbox viewing experience. This will be similar to the Inbox experience within our web application, so if you're familiar with that, you should be able to navigate simply and easily.
Within your initial view, we have a number of icons that allow us to perform and access a variety of functions, identified above by the coloured squares:
- Side Navigation Panel (green)
- Inbox Filters (Red)
- Message Sorting (Blue)
- Mark All as Read (Yellow)
- Poster View vs Message View (Violet)
You'll also, of course, have access to our asset player, allowing you to review content. We'll take a look at this below, too.
Side Navigation
Opening up our side navigation panel brings us to the following UI:
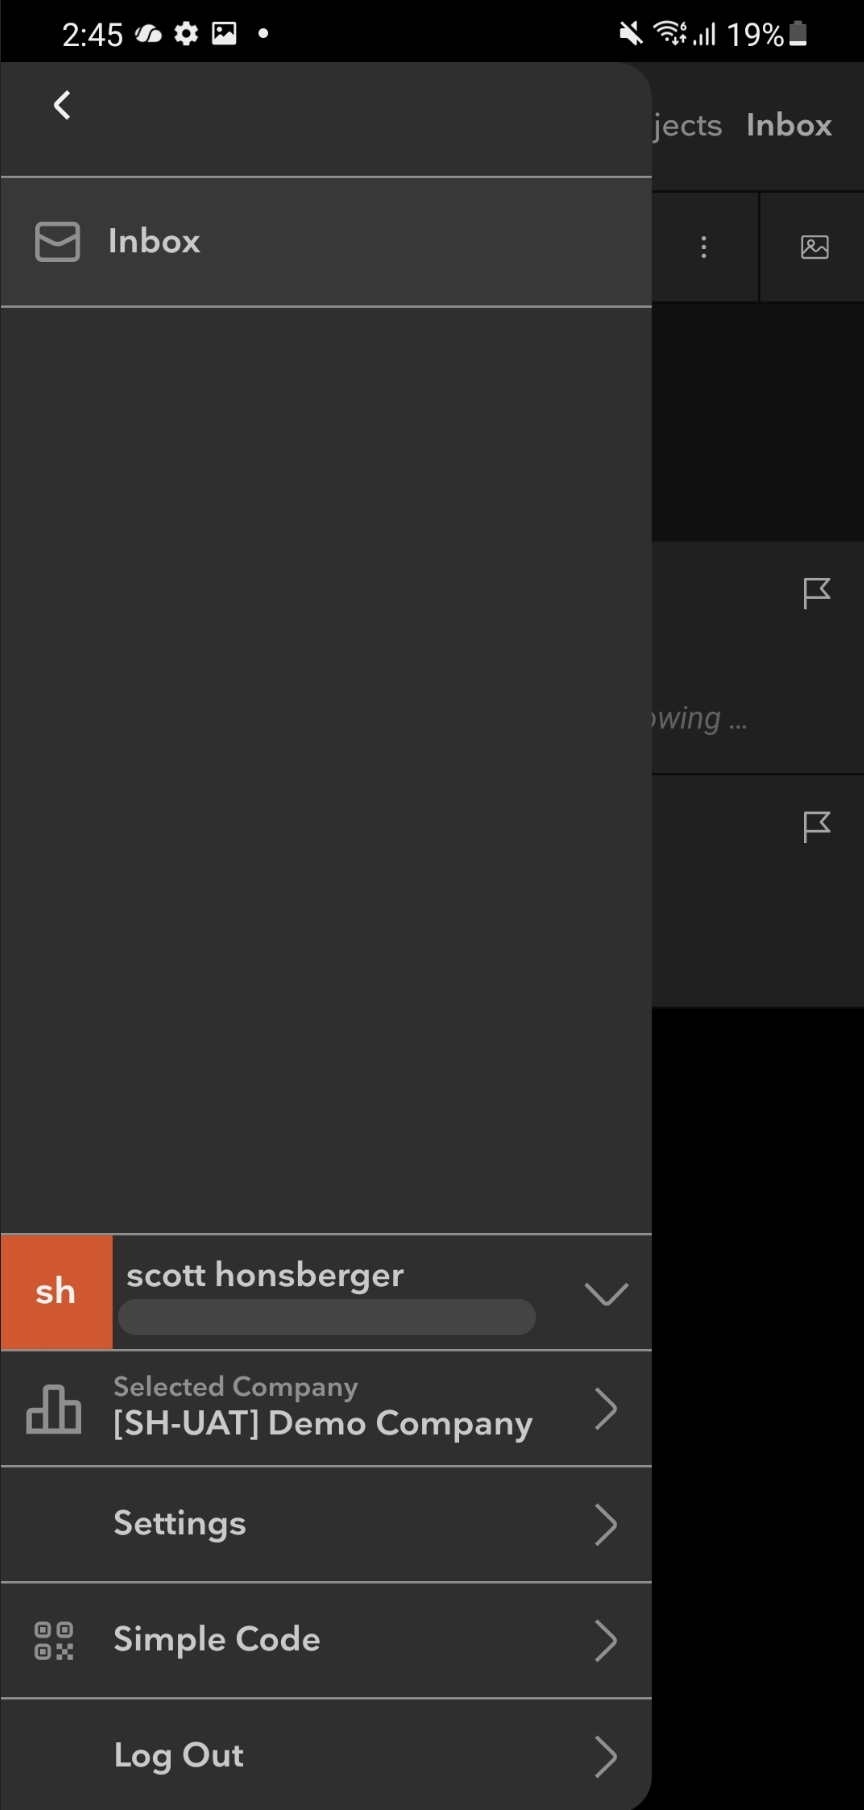
From here, we have a number of functions that we can access:
-
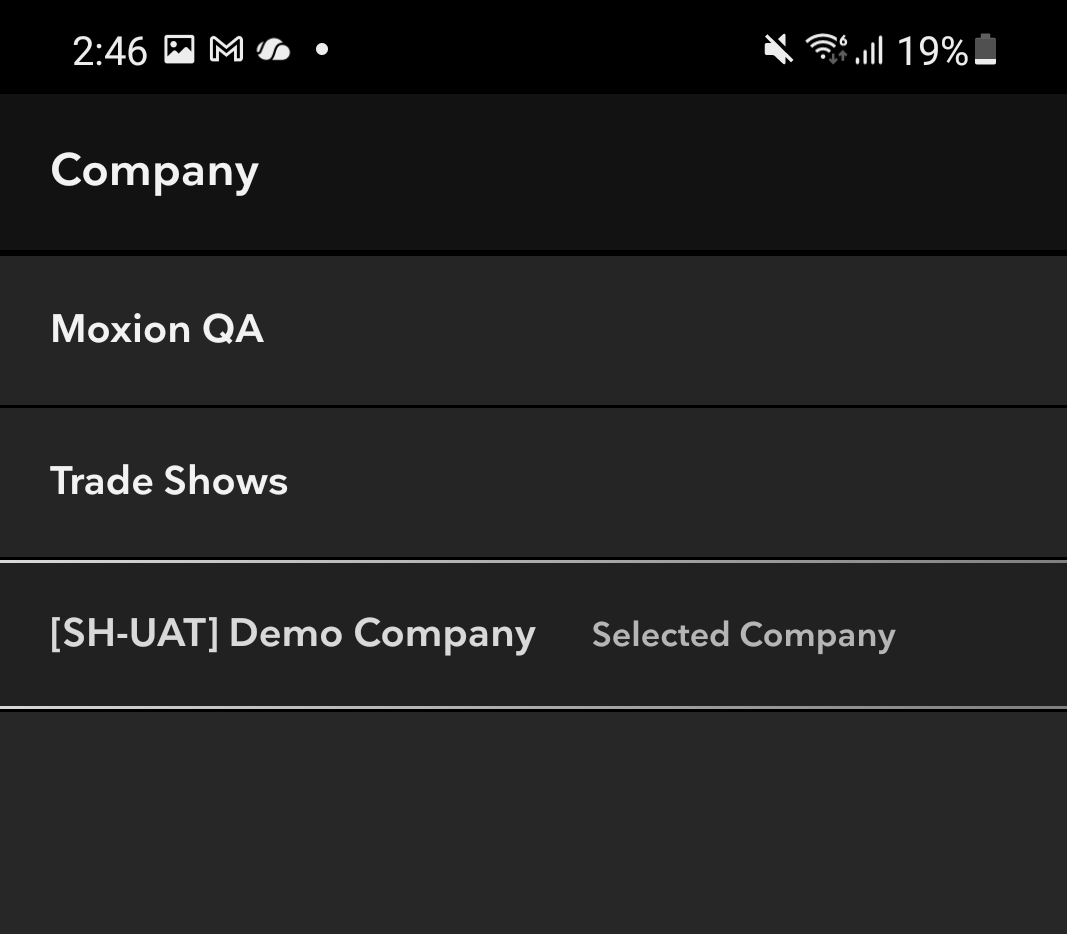
Company Selector
-
This allows us to select the specific Company we want to highlight. Most users will only have content under one Company, but for those who are under multiple Companies, this is where you can come to select which one you want to work with
-
-
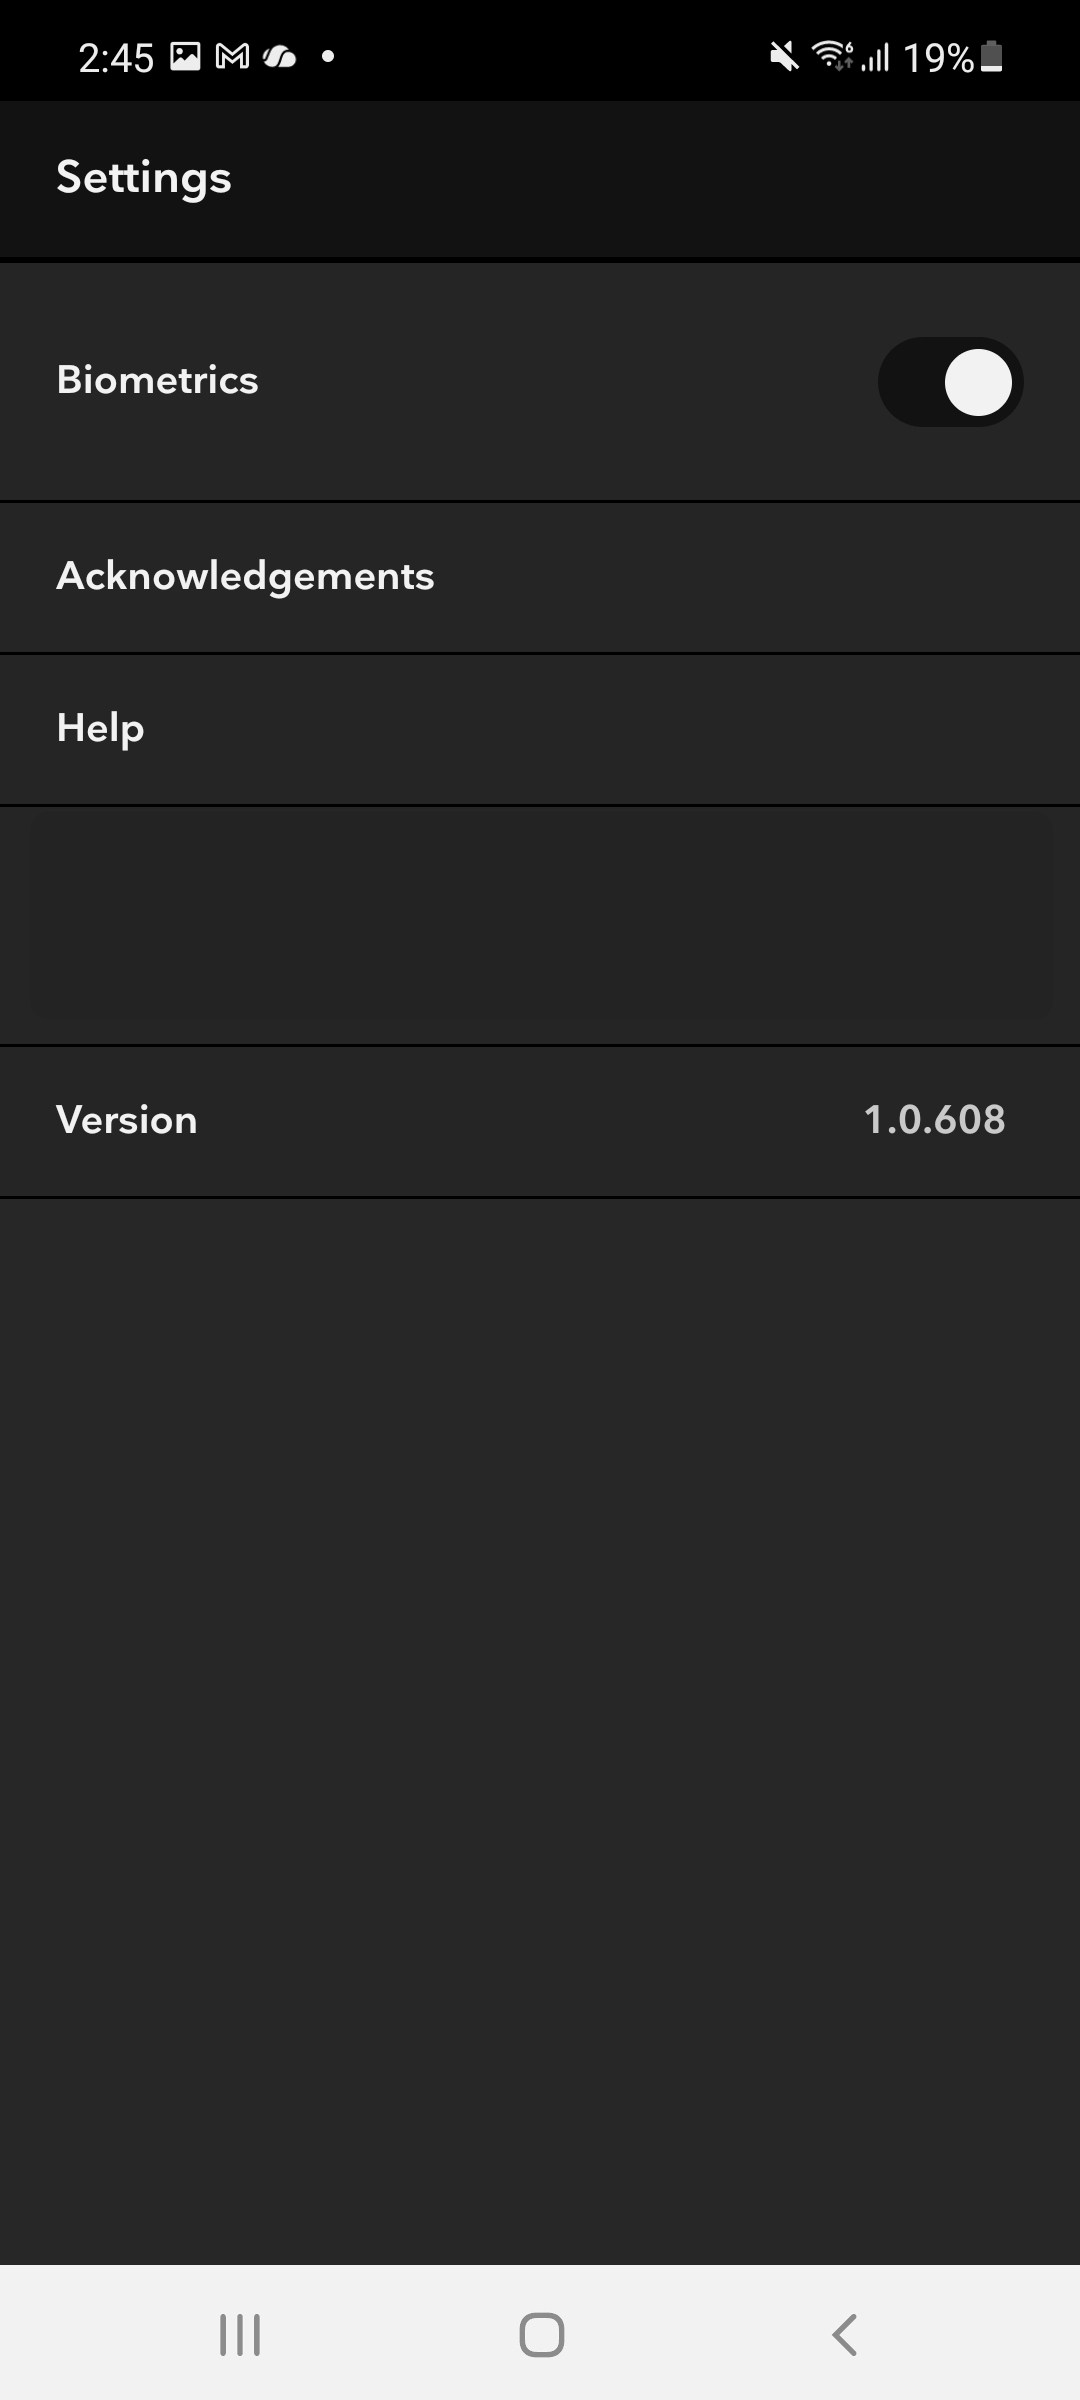
Settings
- This brings up your user settings, which contains the following
- Biometrics: Toggle the ability to access Flow Capture using Biometrics ON or OFF
- Acknowledgements: The Autodesk and Flow Capture TOS
- Help: A direct link to our help page
- Version: The version of our Android app that you're using

-
Simple Code:
- This is used in conjunction with our Apple TV app. This allows you to log in to that device using a Simple Code instead of your usual authentication. For more, have a look at our help doc on Simple Code Login
-
Log Out:
- This allows you to log out of Flow Capture
Inbox Filters
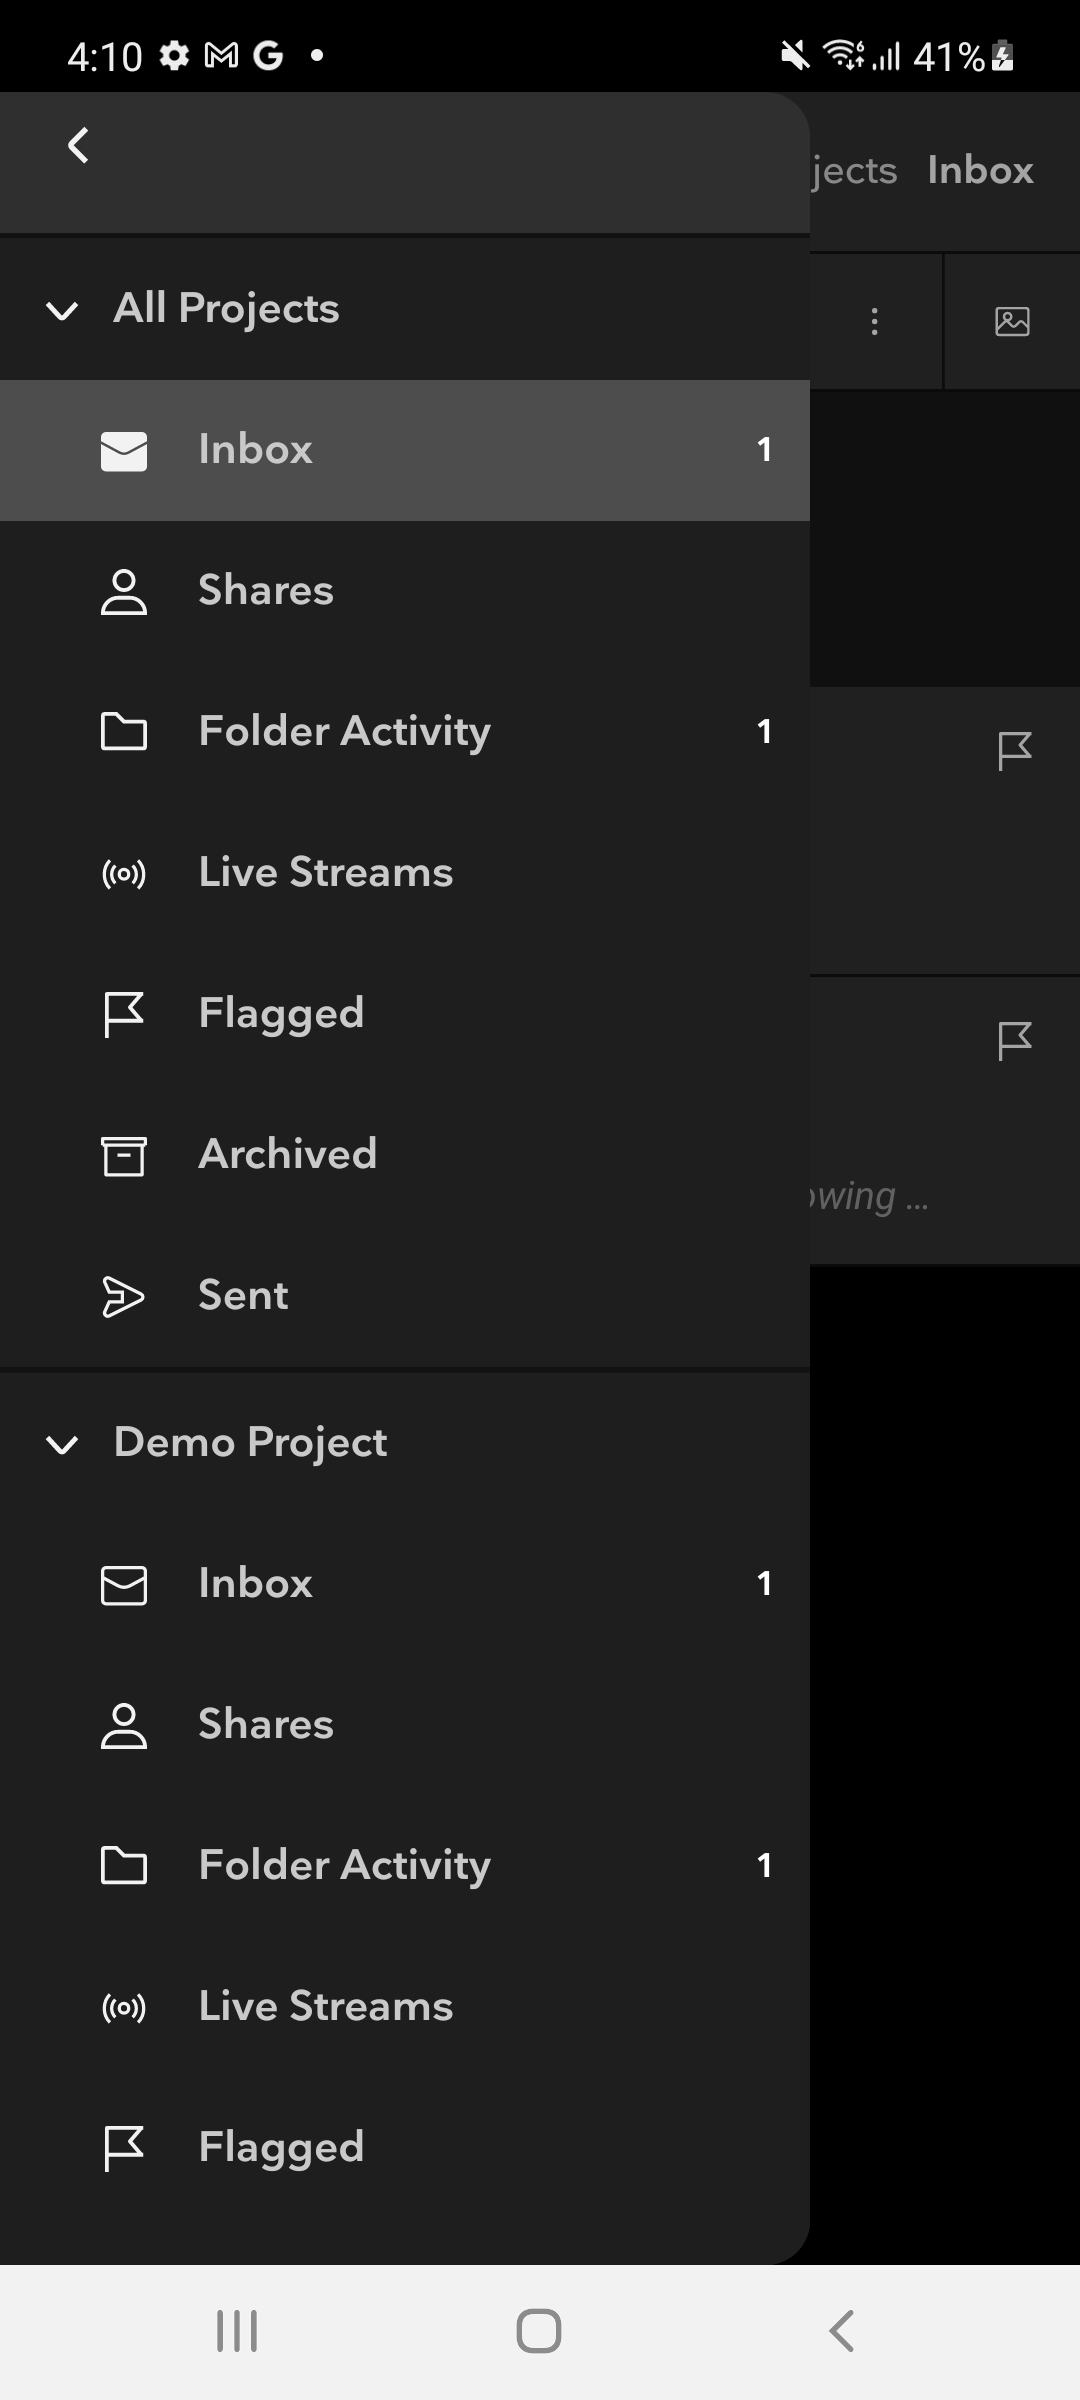
By default, your Inbox will show all types of notifications from all of the Projects that you're a participant on.
If you'd like, you can filter your messages based on your current workflow needs.
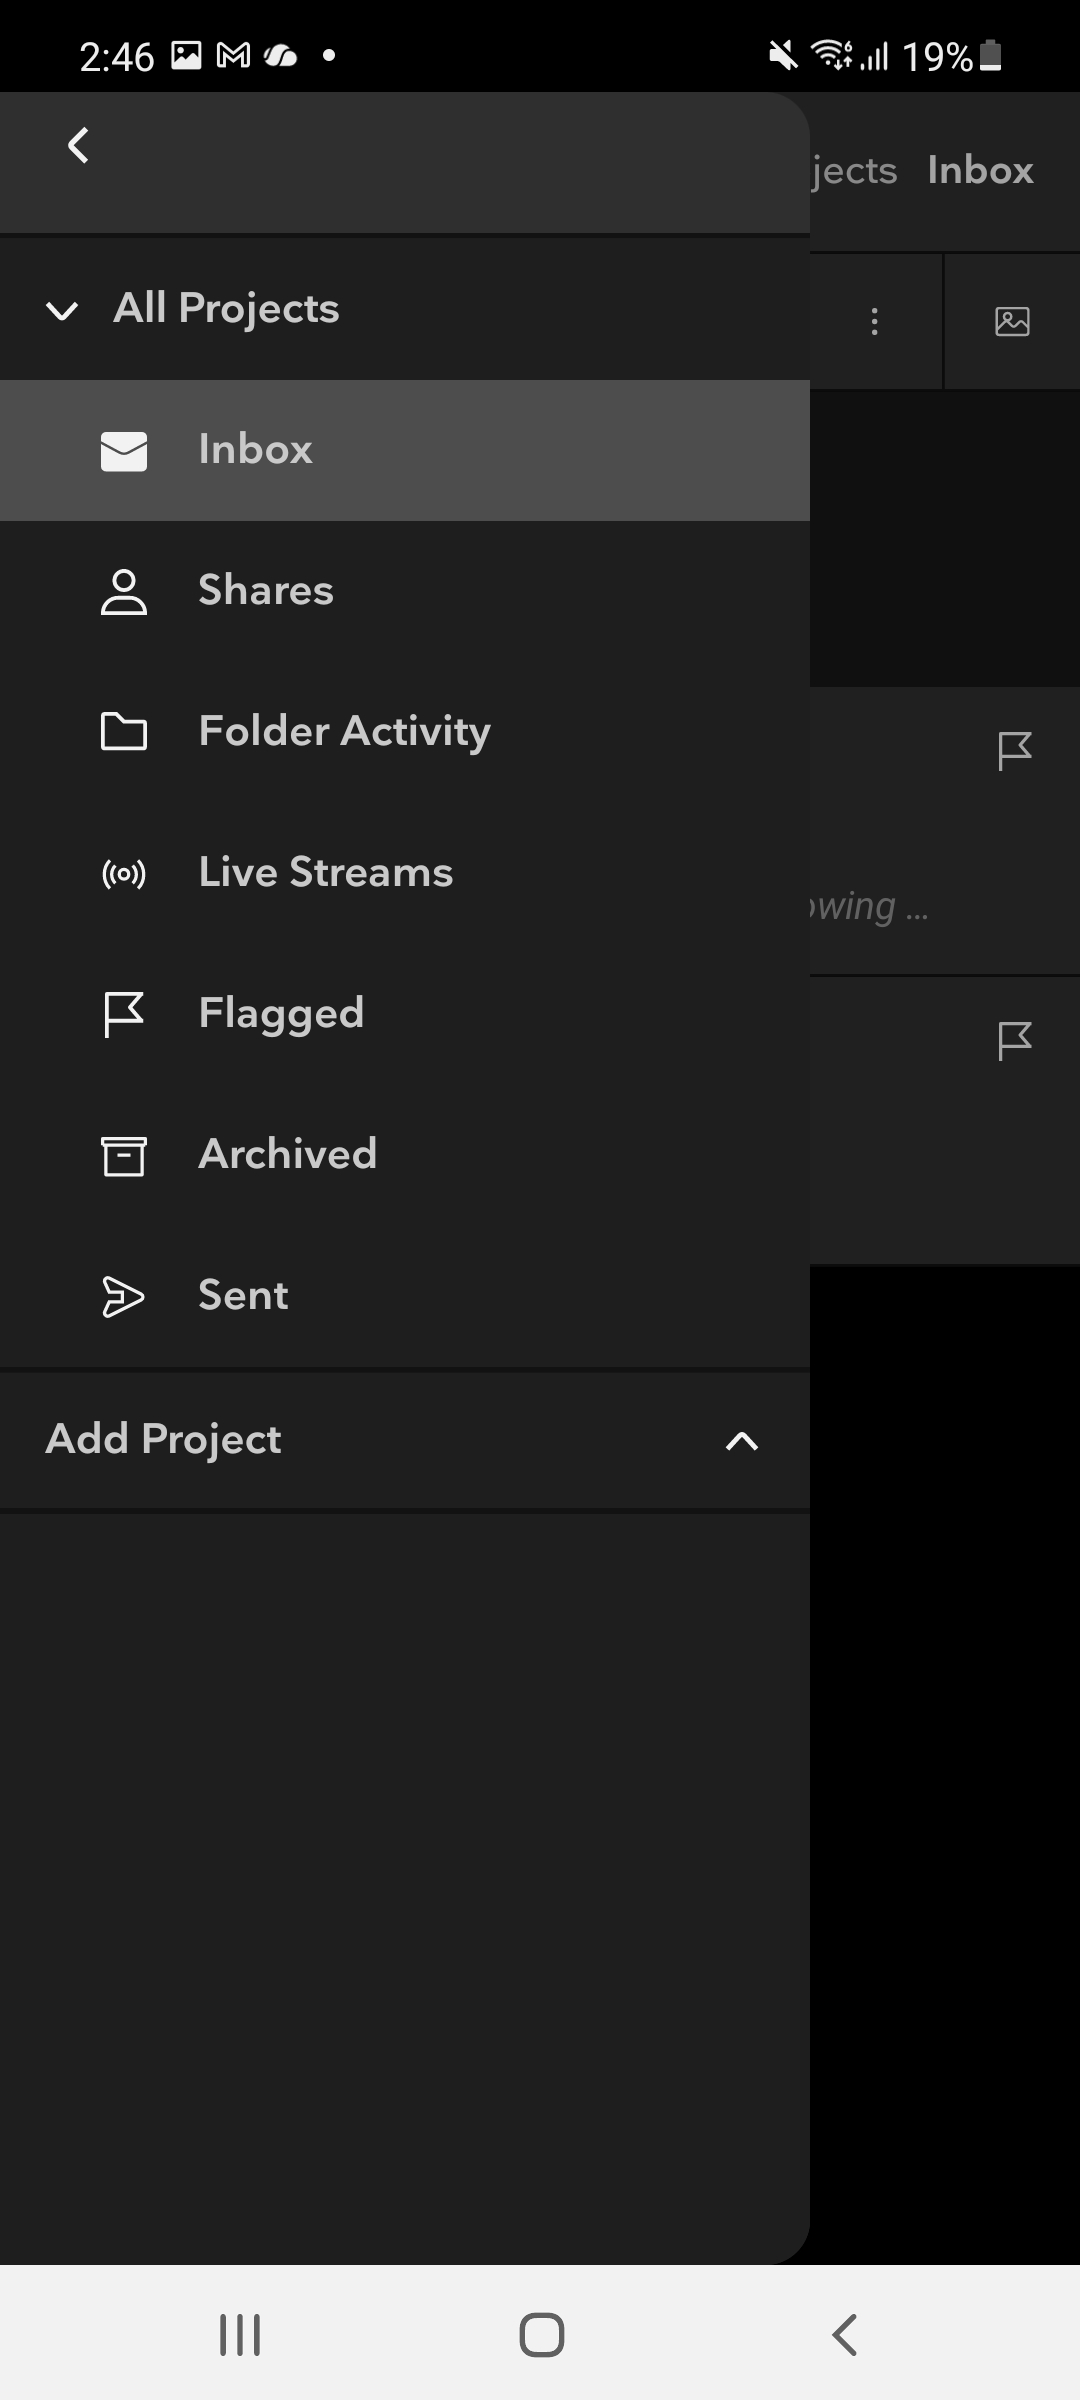
- Inbox: All messages and message types across all projects
- Shares: Clicking into this view will only show you notifications related to any Shares that have been sent to you
- Folder Activity: Clicking into this view will only show you notifications related to any folder activity on folders that you've been added to. Typically, this is where you'd find any Upload Notifications or Comment Notifications
- Live Streams: Any live stream assets that have been sent to you will appear here
- Flagged: Any messages that you choose to flag will appear here
- Archived: Any messages that you choose to archive will appear here
- Sent: Any in-app notifications that you've sent will appear here. Typically, these are things like Shares that you've sent, Upload Notifications that you've sent, etc.
- Add Project: Clicking into this drop down will allow you to add a Project-specific filter. Once added, you'll see all of the same filter options as above, but they will only display notifications from that specific Project
Message Sorting
When reviewing messages, you have the ability to sort by either Date or Read Status. By default, you'll be viewing by Date, with the most recent items at the top.
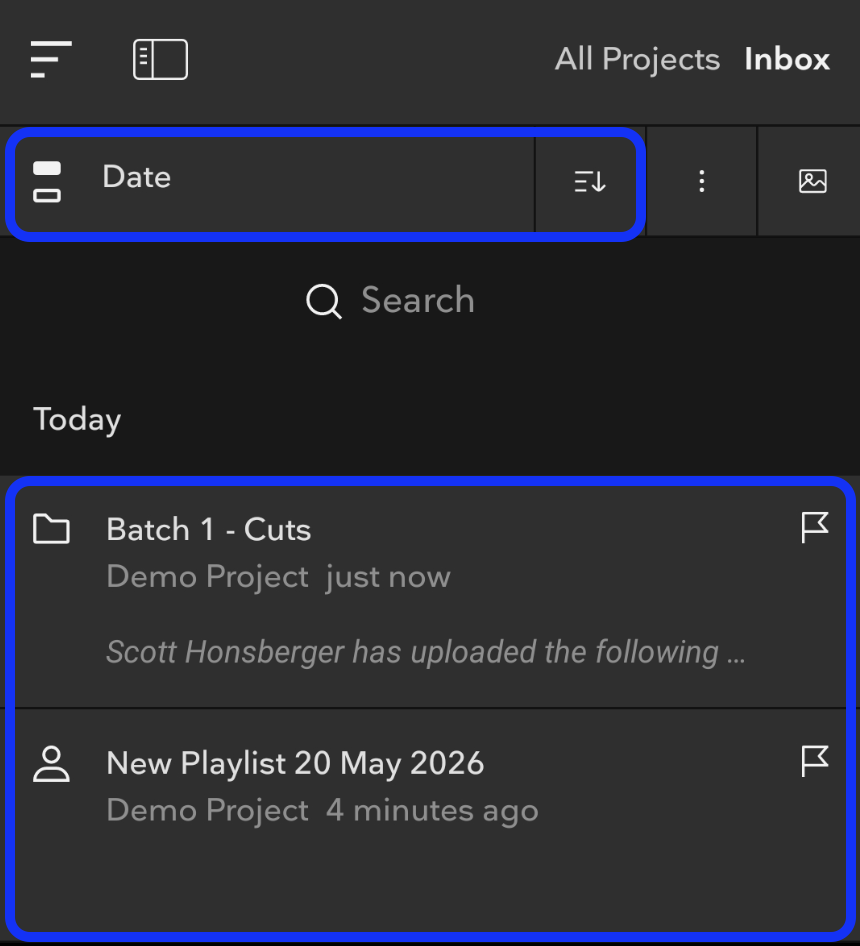
Tapping on the word Date will switch you to sorting by Read Status, which will have any Unread messages at the top.
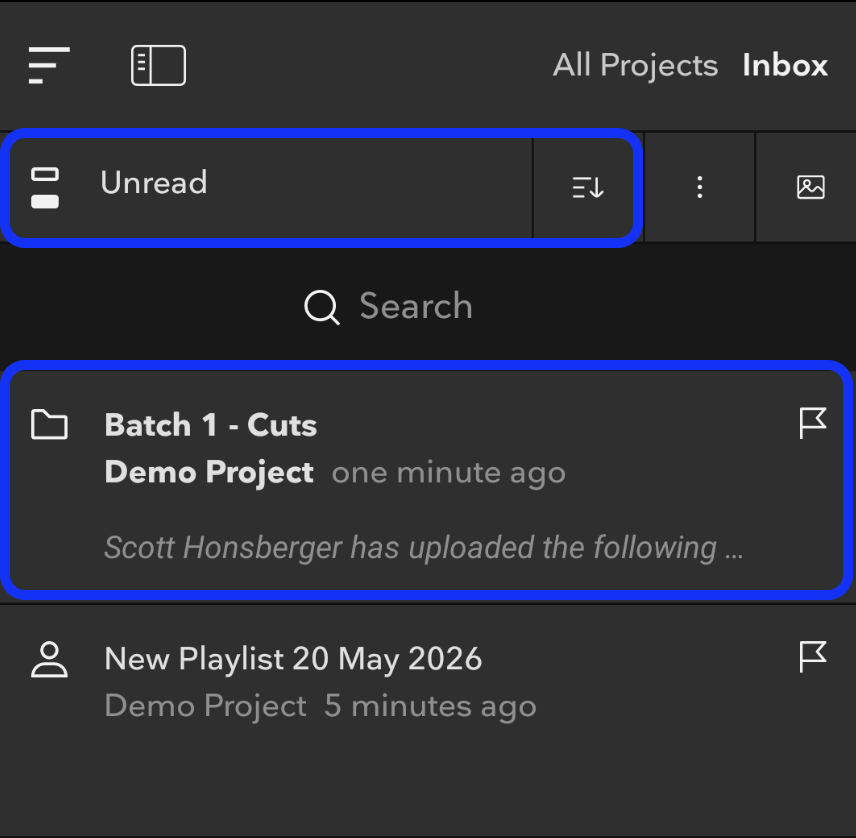
Clicking the word Unread will switch you back to sorting by date.
To the right of either Date or Unread, you'll see the sort order preference (a downward arrow). This allows you to switch between Most Recent to Least Recent if sorting by date, or switch between Unread at the top and Unread at the bottom if sorting by Read Status.
Mark All as Read
The Mark All as Read icon, three vertical dots, simply marks all of your messages as Read.
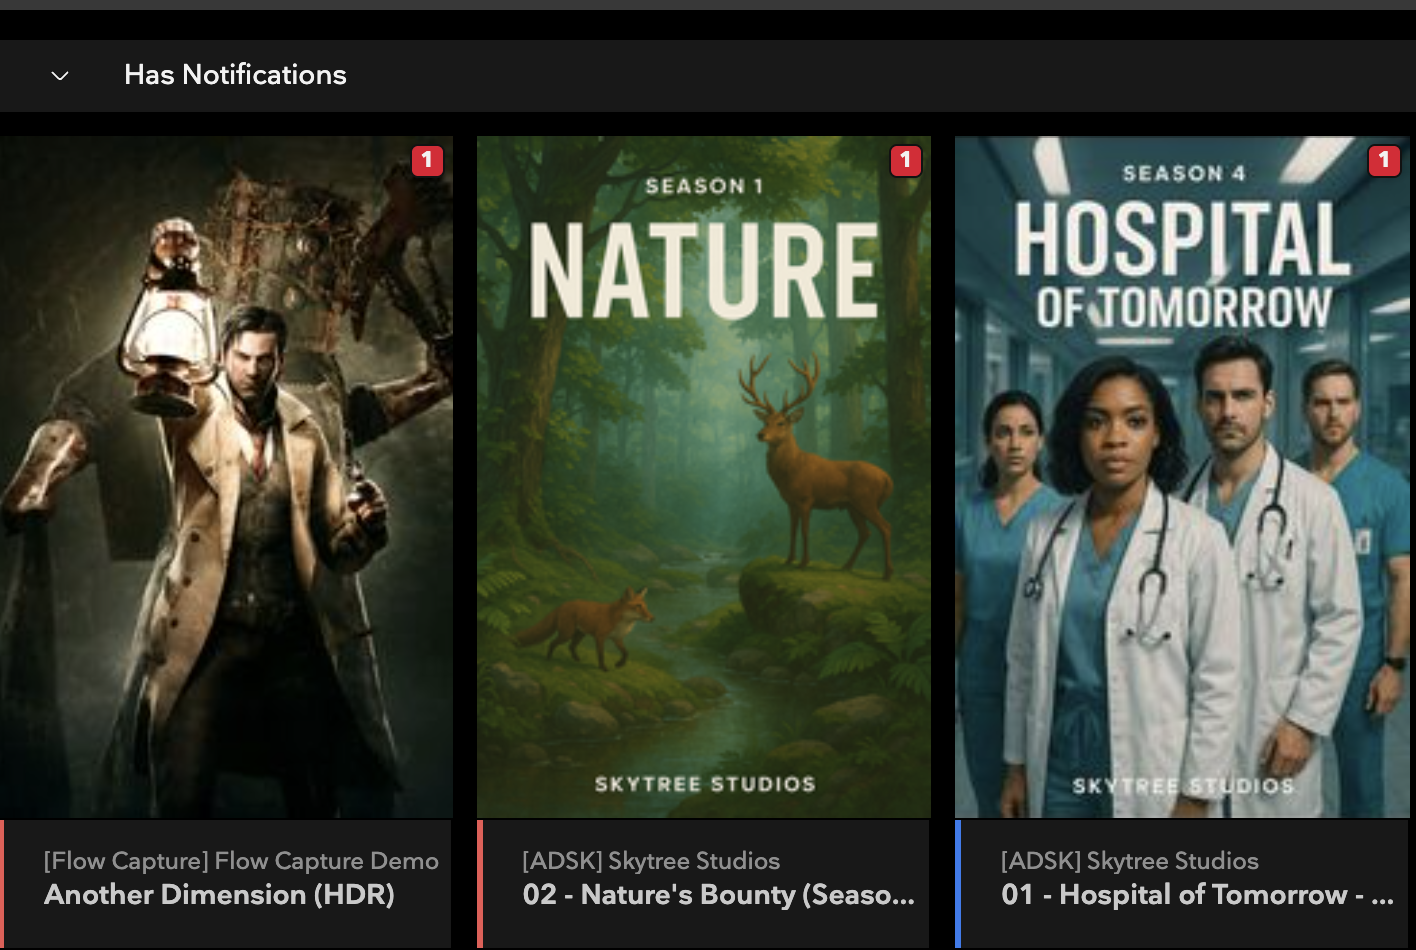
Poster View vs Message View
This icon allows you to switch between Poster View and Message View when reviewing your messages, with the default being Message View.
The Poster view is a more visualized approach to your messages, displaying each Project with that Project's poster image, allowing you click in to any Project to review related content.
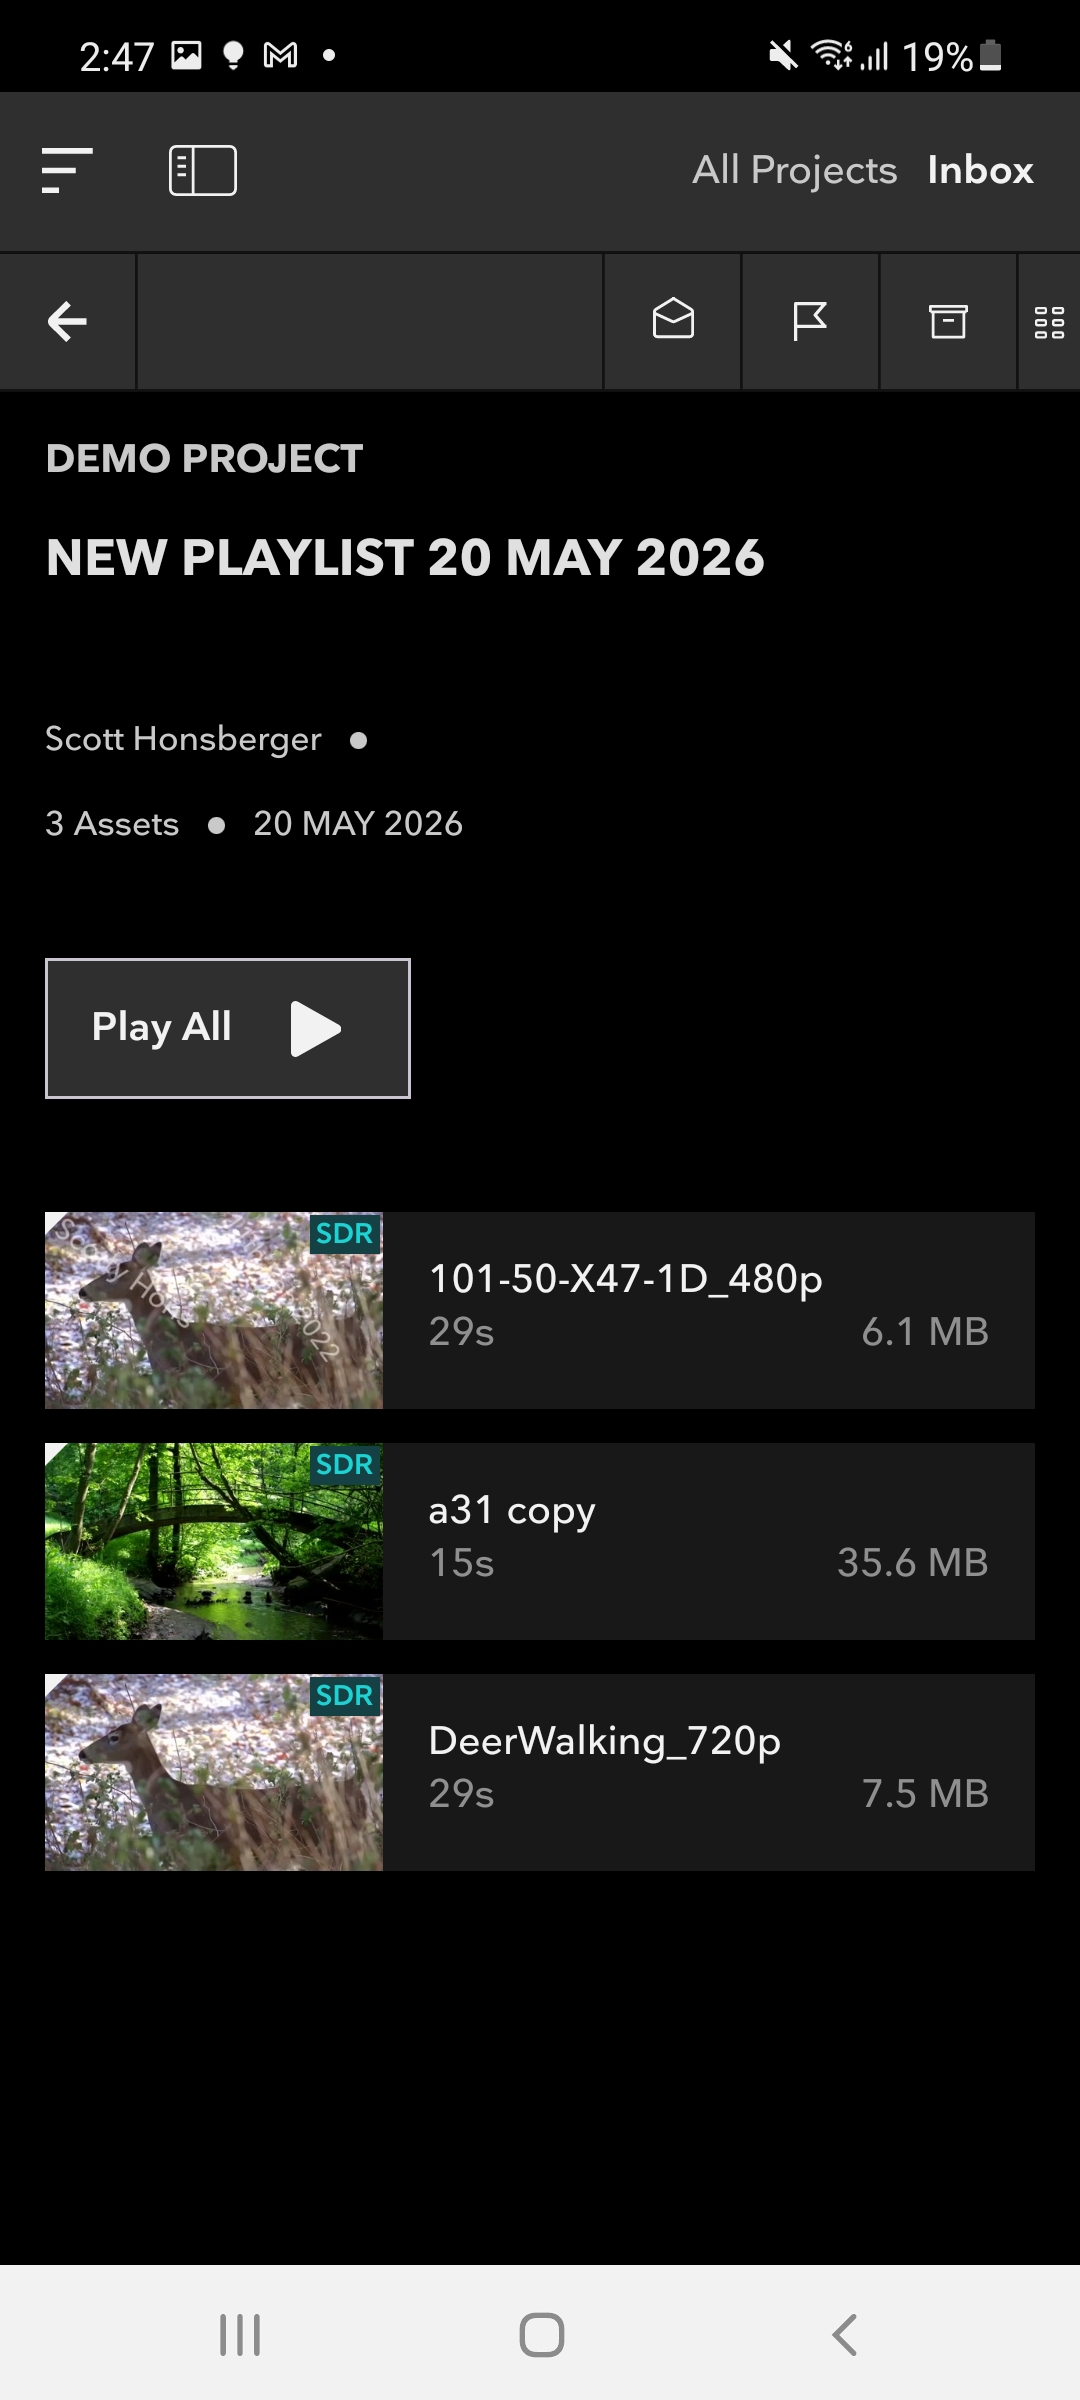
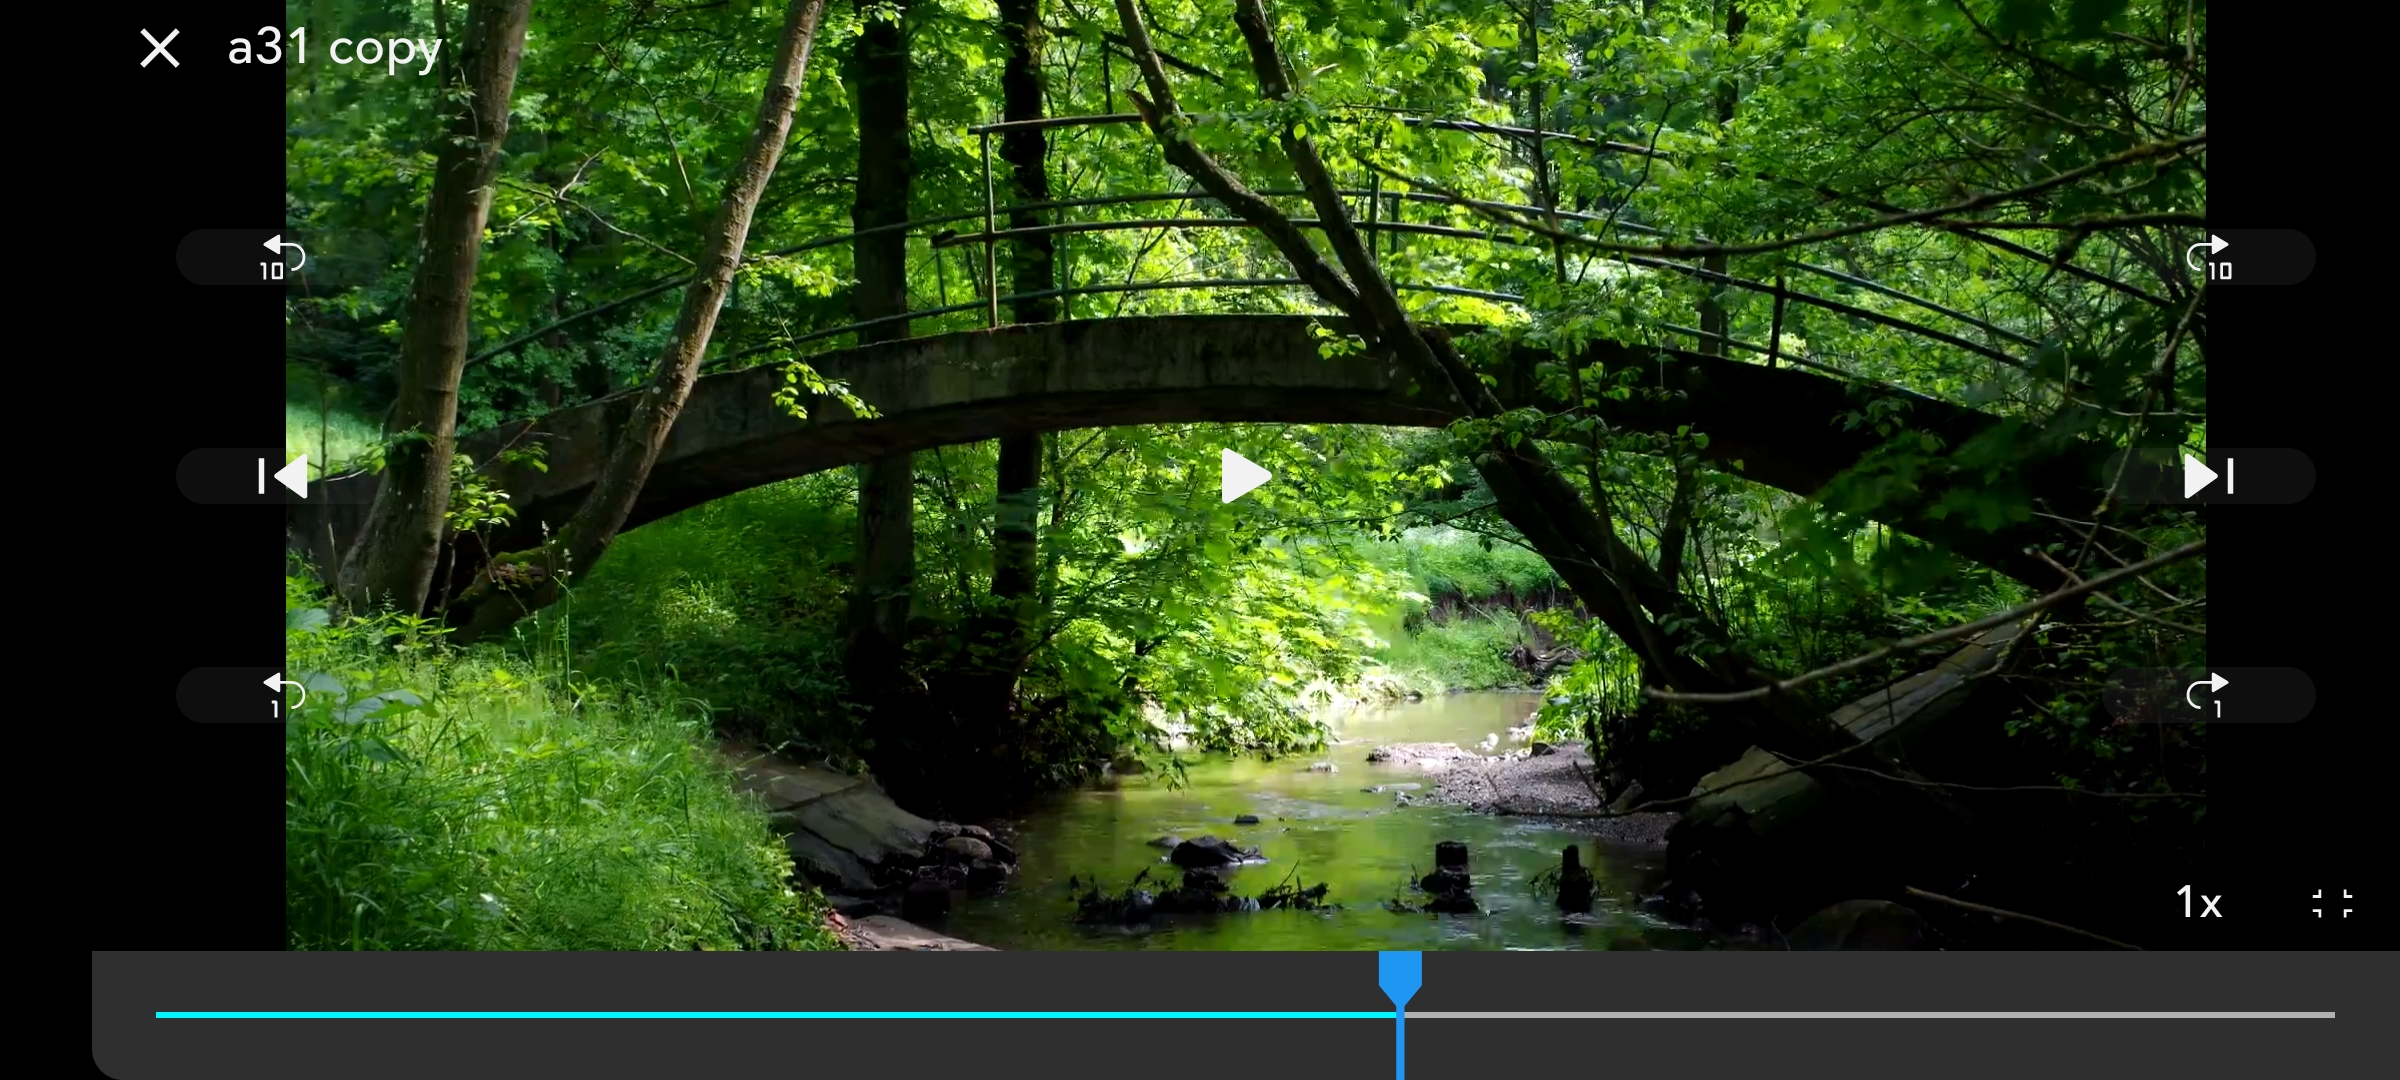
Viewing Assets in our Player
When reviewing messages in your Inbox, you'll see thumbnails for each asset included in that message, as well as a Play All button. When clicked, you'll be brought into our Asset Viewer, which allows you to review assets and the related information about those assets.
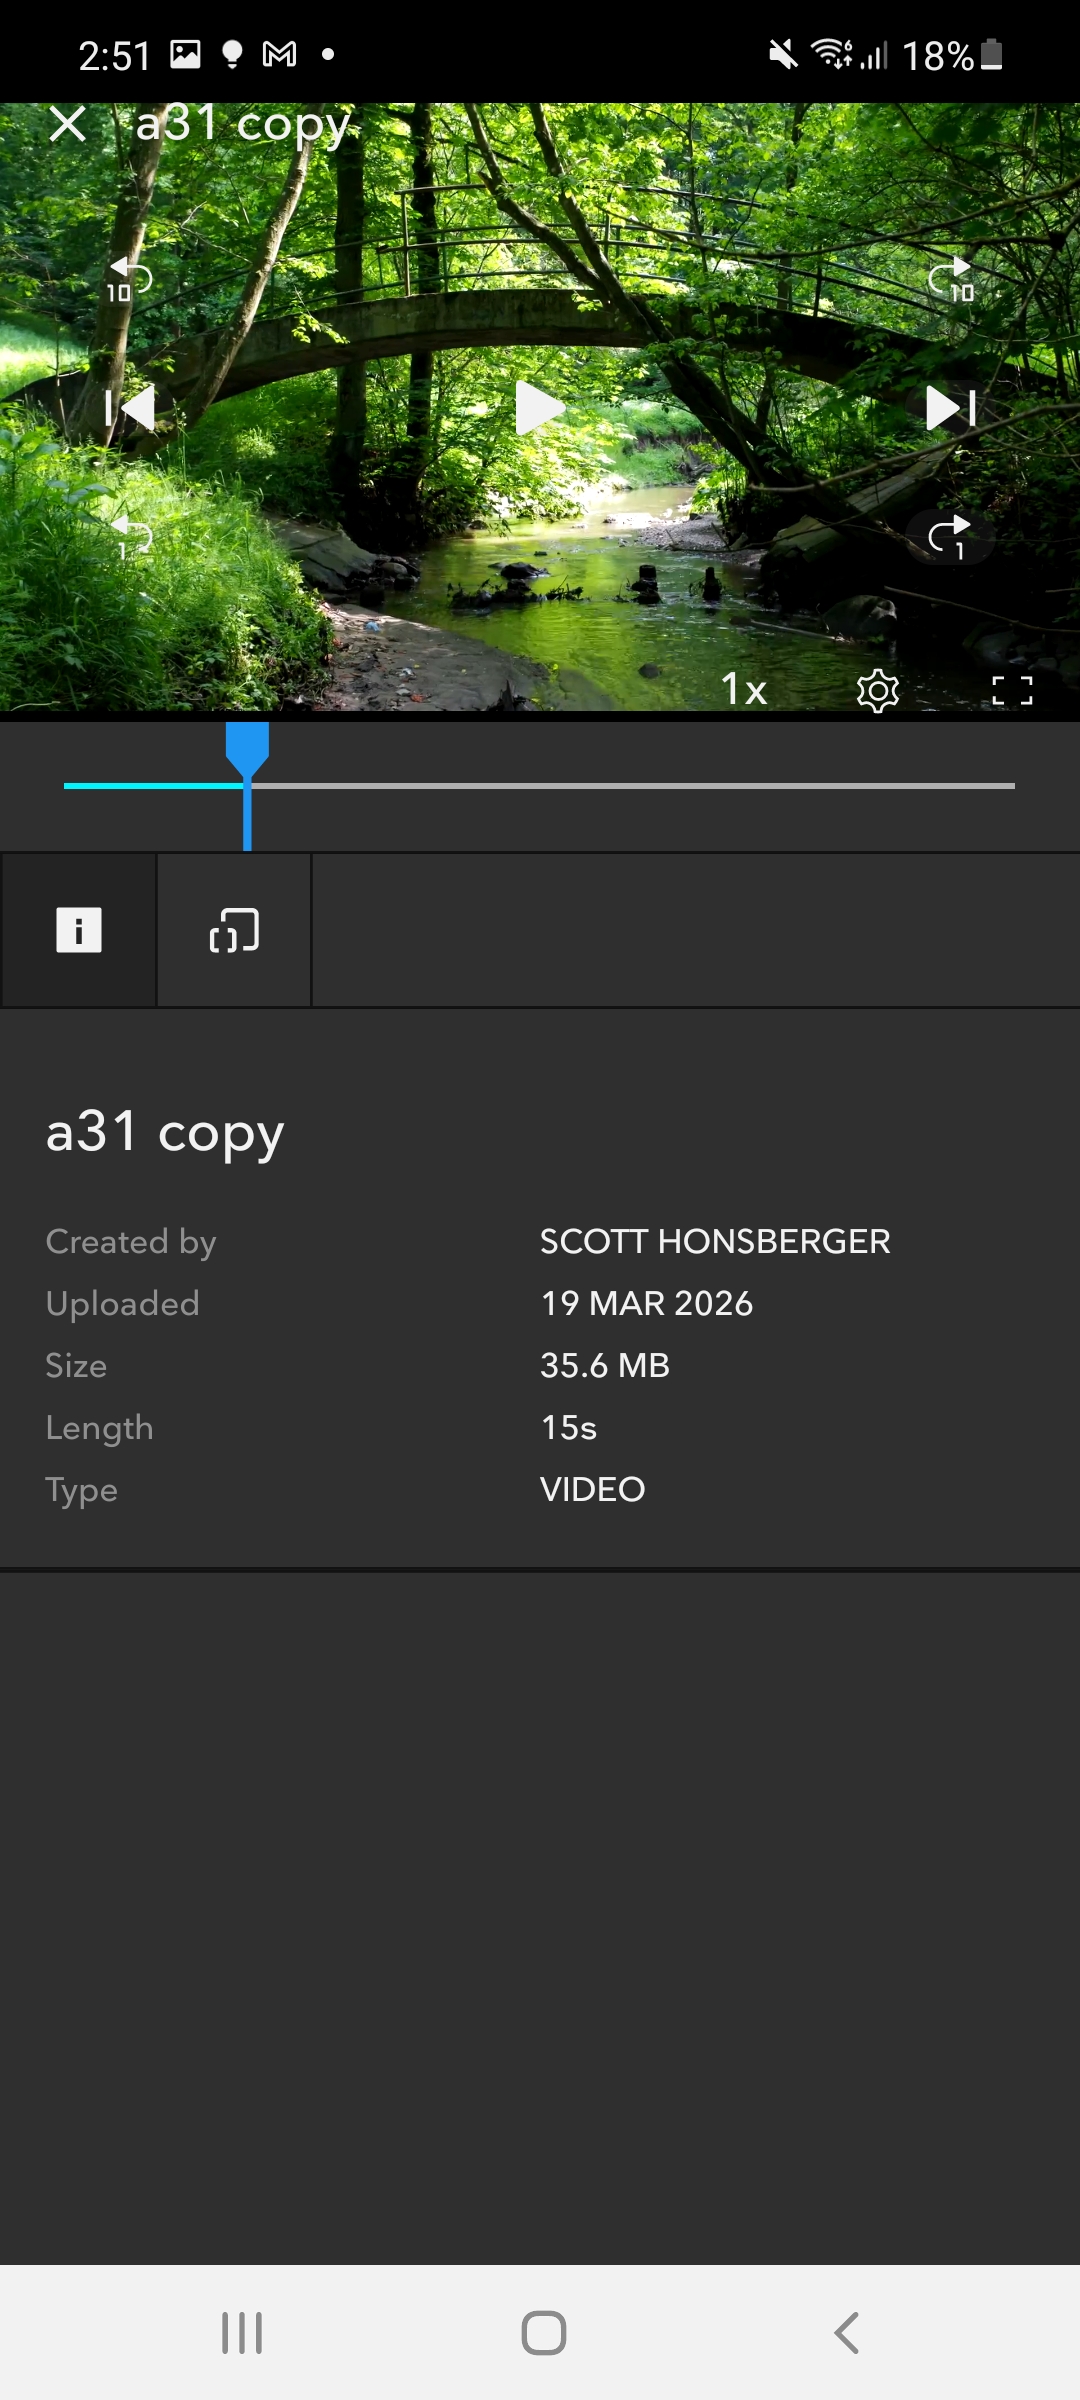
Once you're in the Asset Viewer, you'll notice that your transport controls are presented as an overlay to your asset. You can:
- Play/Pause
- Move back 10 seconds
- Move forward 10 seconds
- Move back one single frame
- Move forward one single frame
Below the asset, you're also presented with some basic information about that file, such as who uploaded it and when, the length, file size, and asset type.
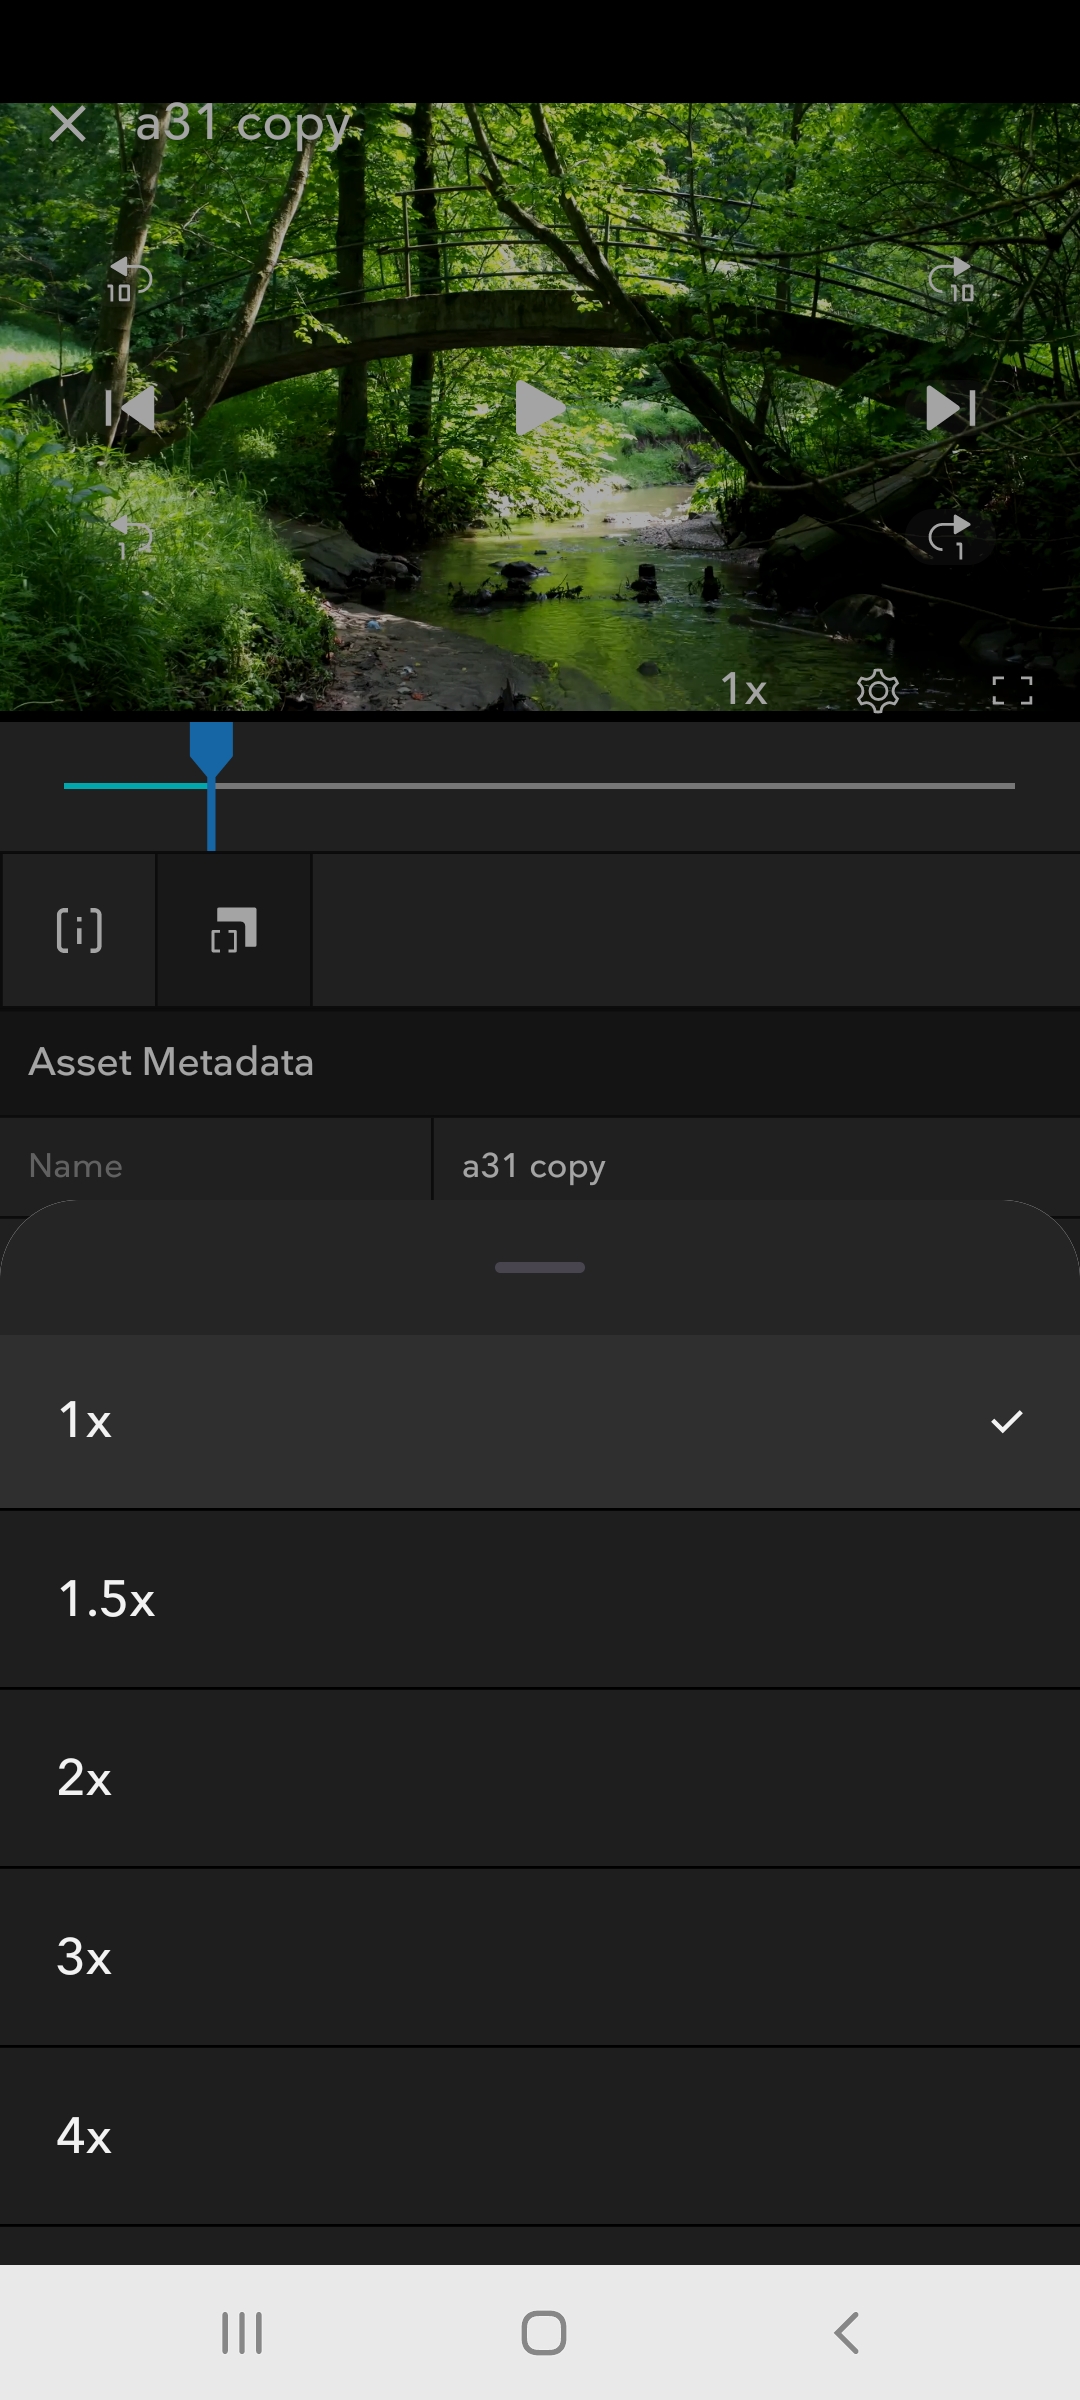
To see all of the metadata related to this asset, just click the Asset Metadata icon (yellow square below), and you'll be presented with information such as episode, scene, shot, take, camera, etc., provided the uploader has filled in these fields.

Directly above the playhead, you'll notice three additional icons: Playback Speed, Playback Settings, and Full Screen.
Clicking the Playback Speed icon will let you change the speed to 1.5x, 2x, 3x, or 4x the normal speed.
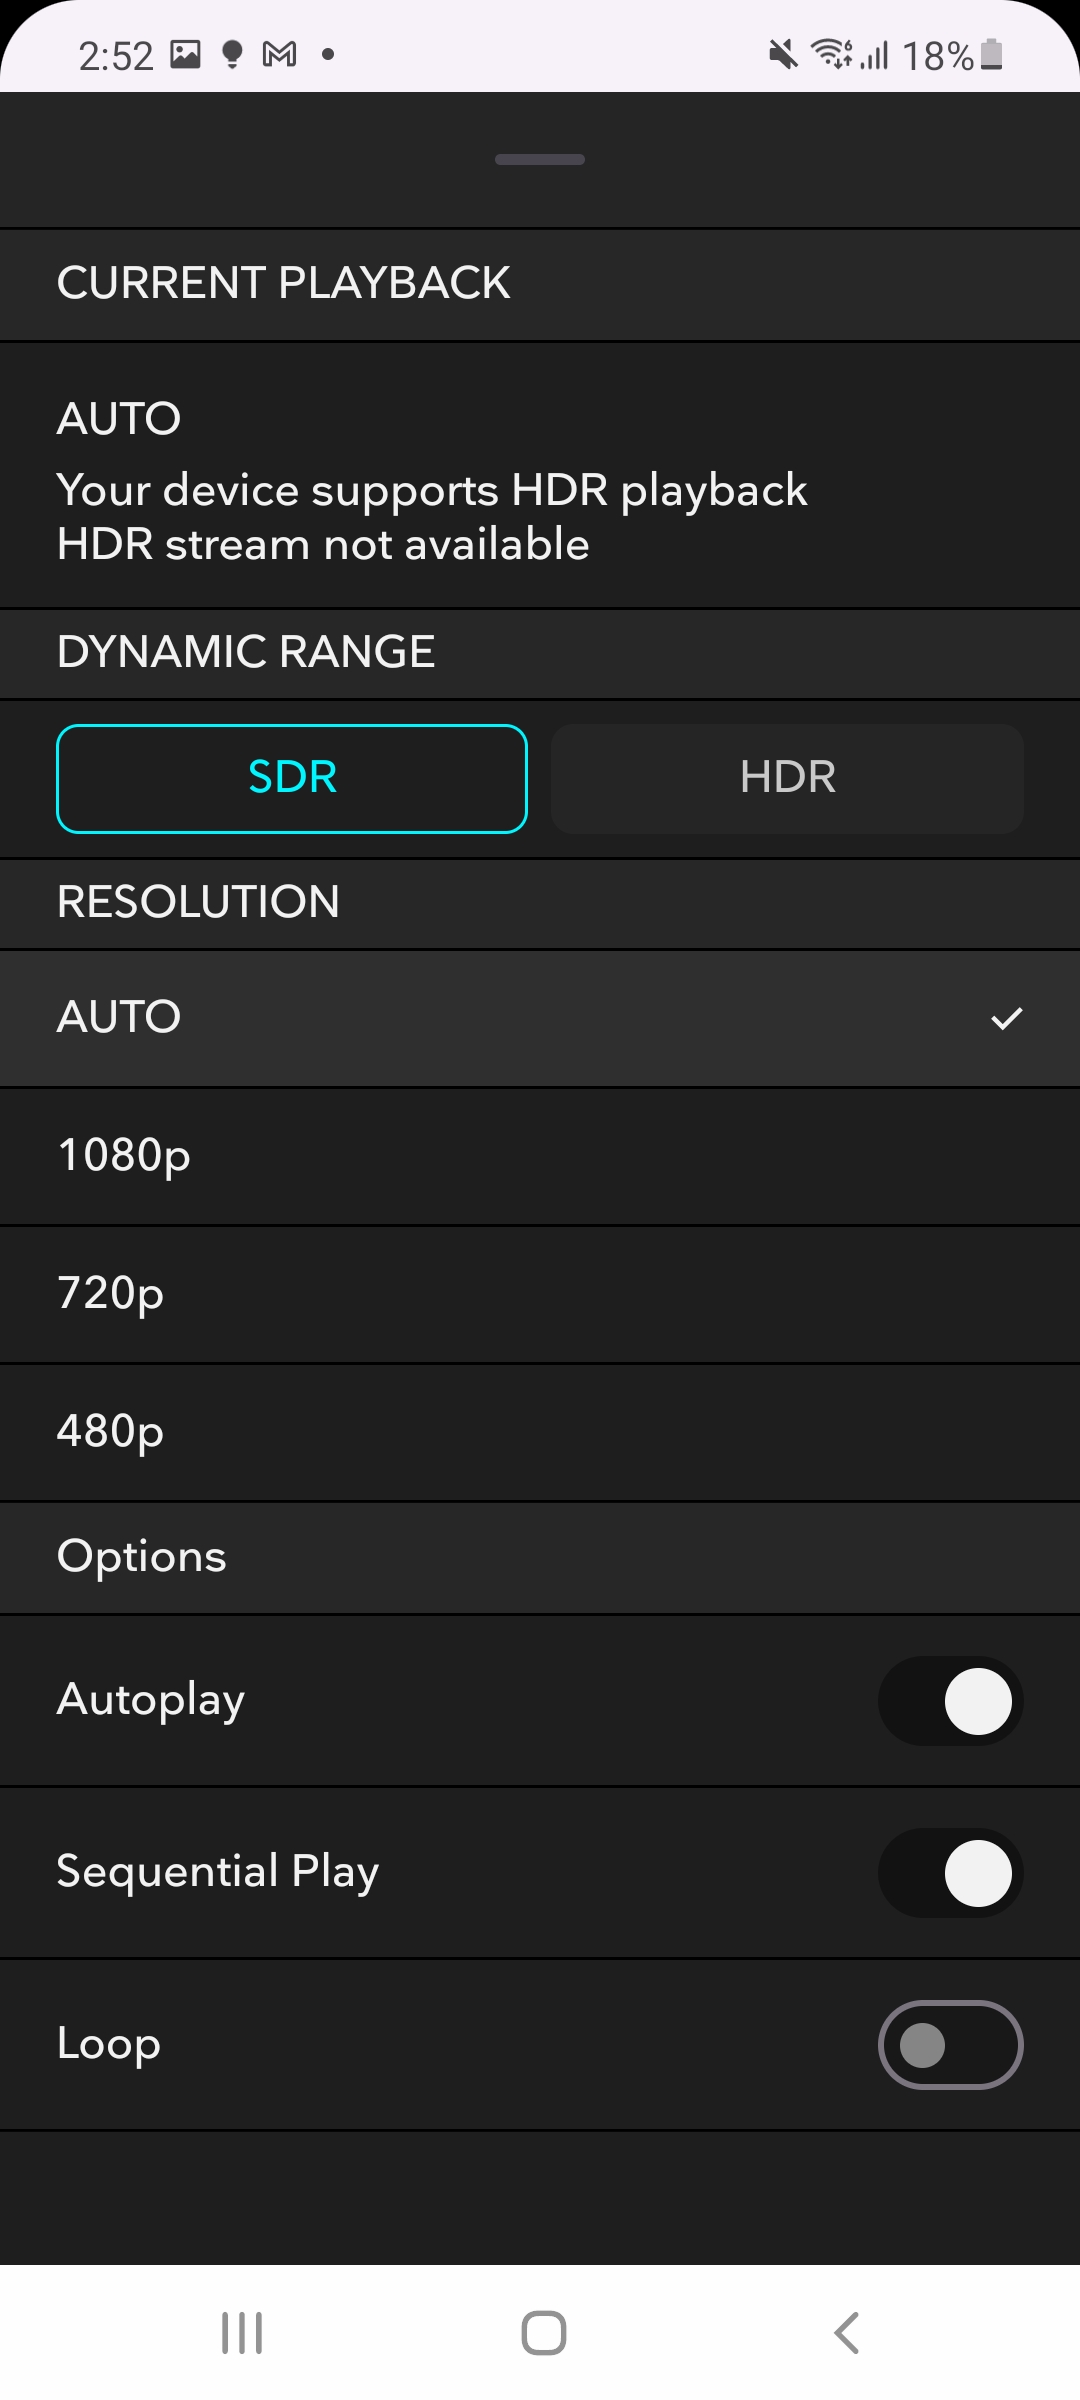
Clicking the settings icon allows you to:
- Select whether you wish to view an asset in SDR or, if available, HDR.
- Select whether you wish to view a specific playback resolution. By default, this is set to "Auto," which will play the best resolution possible based on your internet signal strength.
- Toggle Autoplay on or off. When on, the asset will play automatically when clicked
- Toggle Sequential Play on or off. When on, the player will play the next asset once the current asset has finished
- Toggle Loop on or off. When on, the current asset will play on a loop
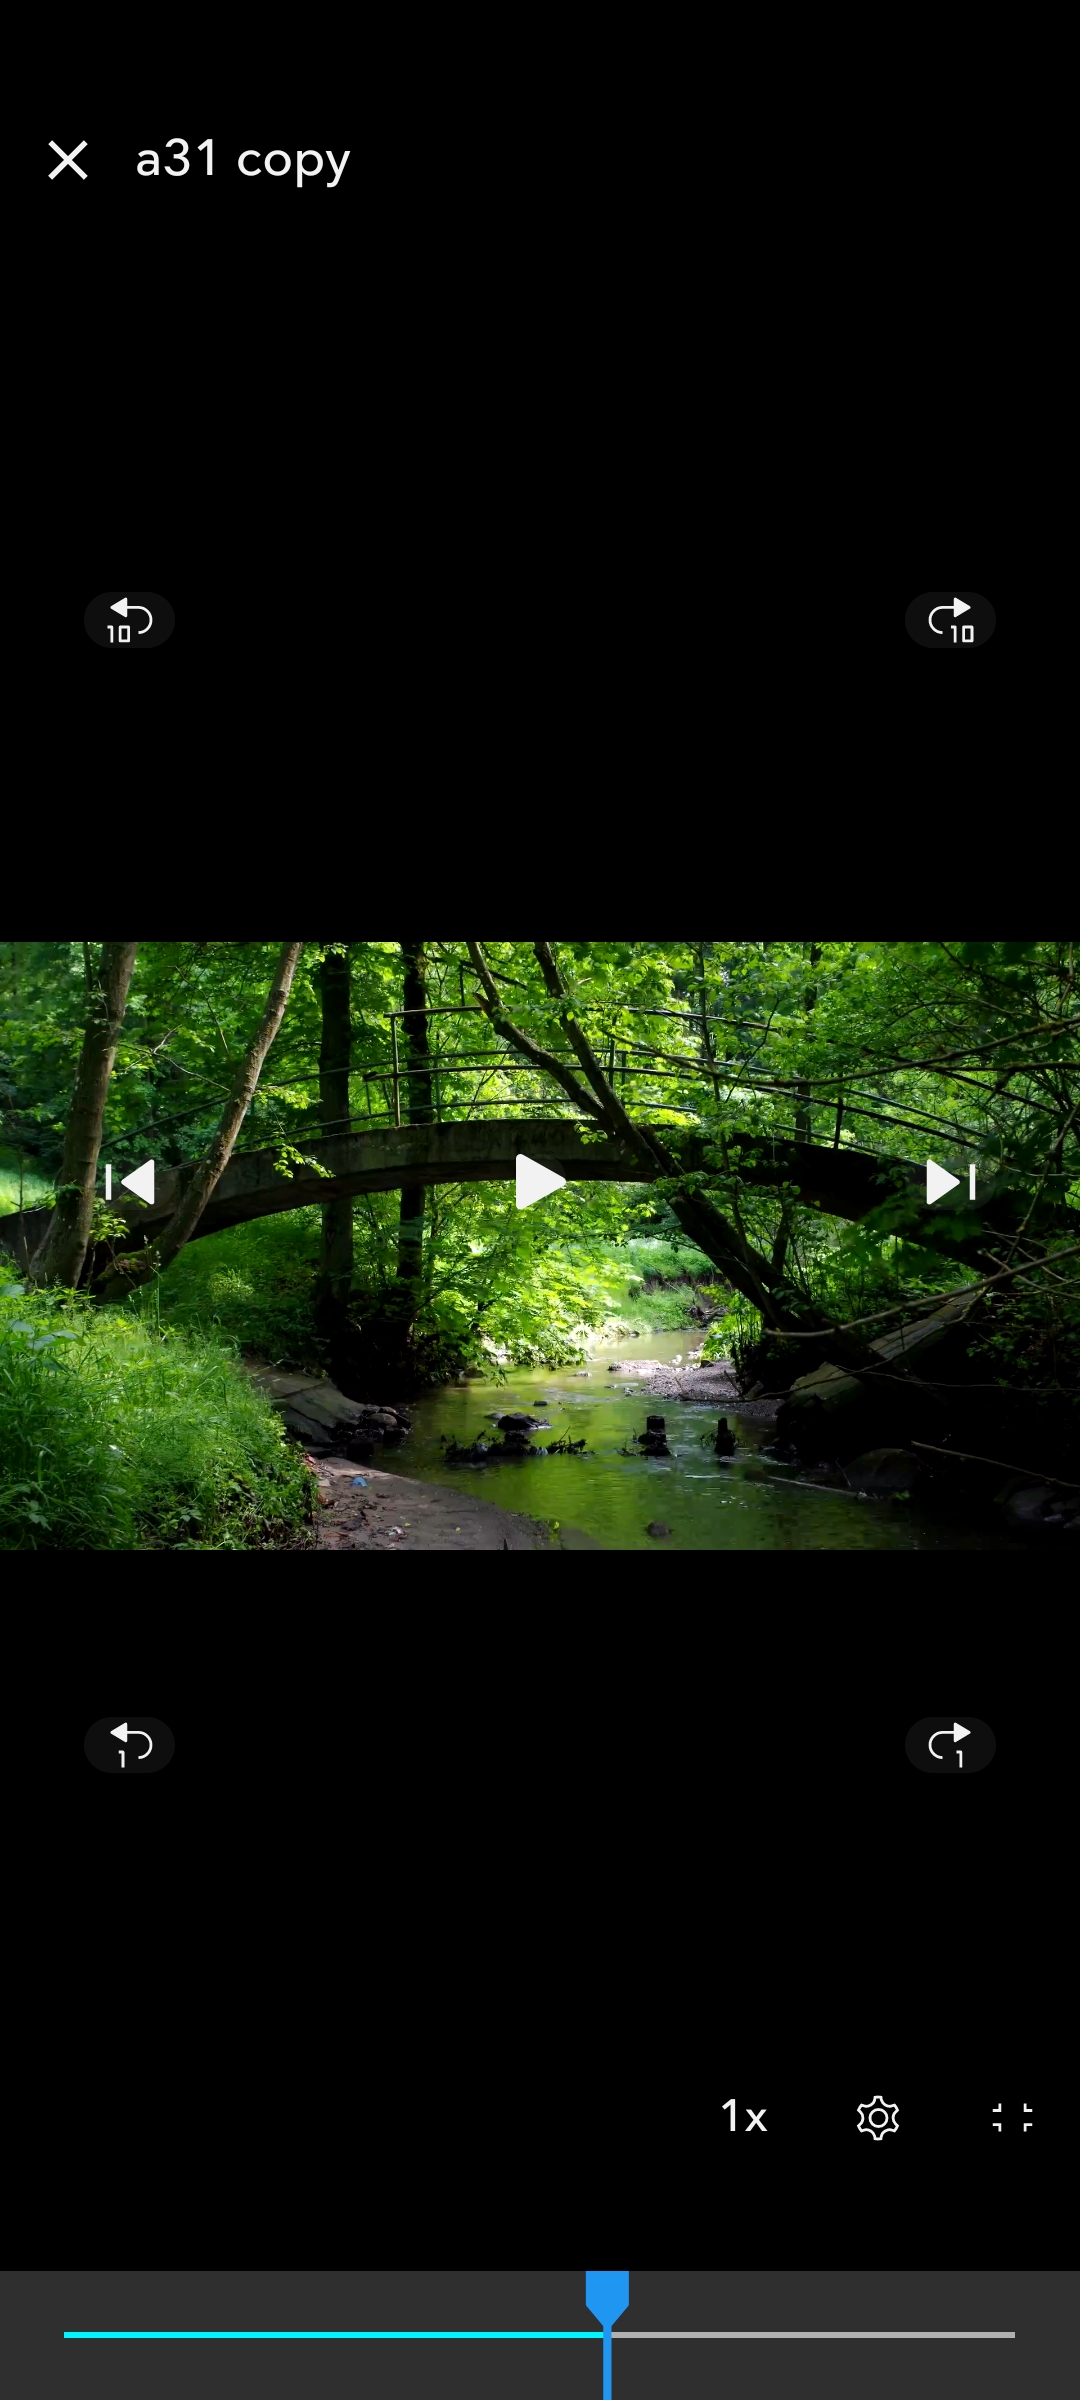
The full screen icon let's you enter into full screen viewing, which can be done in either portrait or landscape mode, depending on the physical orientation of your Android device.
DeX Mode
In addition to our app, DEX mode is an alternative option. Short for Desktop Experience, this mode gives certain Samsung phones and tablets the ability to act like a Windows or Mac computer desktop. Any Galaxy S8 or newer phone and Galaxy Tab S4 or newer tablet should have and be able to support DeX, and you can find a full list of supported devices here.
Setup
All you need to get this working is a USB-to-HDMI cable and monitor or display with an HDMI port. Once you've connected your device to the display, a Start Samsung DeX prompt will appear. Navigate through the setup process and then select Start.
From there, you should be able to either open up the Chrome browser and navigate to your login portal (e.g. app.moxion.io), or use an email notification we've sent out to direct yourself where you need to be. Once you've logged in, you'll be able to start reviewing just about any assets (DeX does not support HDR or Dolby Vision playback) that you need to work with.